
Summary
The best vegetables for your garden are the following:
- Radishes
- Leafy greens
- Leaf lettuce
- Head lettuce
- Spinach
- Kale
- Chard
- Peppers
- Hot peppers
- Sweet peppers
- Carrots
- Beets
- Potatoes
- Peas
- Squash
- Summer squash
- Winter squash
- Tomatoes
- Indeterminate tomatoes
- Determinate tomatoes
- Onions
- Cucumbers
- Beans
- Bush beans
- Pole beans
Every vegetable garden I’ve planted starts as a blank slate.
That blank slate can be exciting!
It represents the freedom to grow what you want. But freedom can also be overwhelming as you struggle with all the directions you can go.
I’ve been there. You’re staring at an empty patch of soil and wondering what the best vegetables for your garden are.
There are ideal vegetables for your garden but know before we get into them that vegetable gardens (all gardens) are forgiving.
You can make mistakes along the way, learn from them, and do better next year.
And eventually, you’ll get to experience that dream of walking outside to gather ingredients for your next meal.
It’s even more satisfying than you think it is.
So, to help you get there, I’ve gathered the best vegetables for your garden below.
Some will be ready to eat a month after planting, some will take two, and others will take the whole season.
I suggest you direct sow (plant seeds into the soil) some plants. I suggest you buy seedlings and transplant them for others.
Plus, growing a variety of vegetables will give you a good sense of the different types you can grow in your soil. More importantly, doing so will give you a good sense of what you enjoy growing.
In short, growing vegetables has lots of pros (and also, sadly, cons).
As a side note, I know some of the vegetables below aren’t actually vegetables but are instead fruits. However, many people, perhaps yourself included, treat them as vegetables, so I’ve included them.
With that in mind, let’s start with radishes.
1 – Radishes
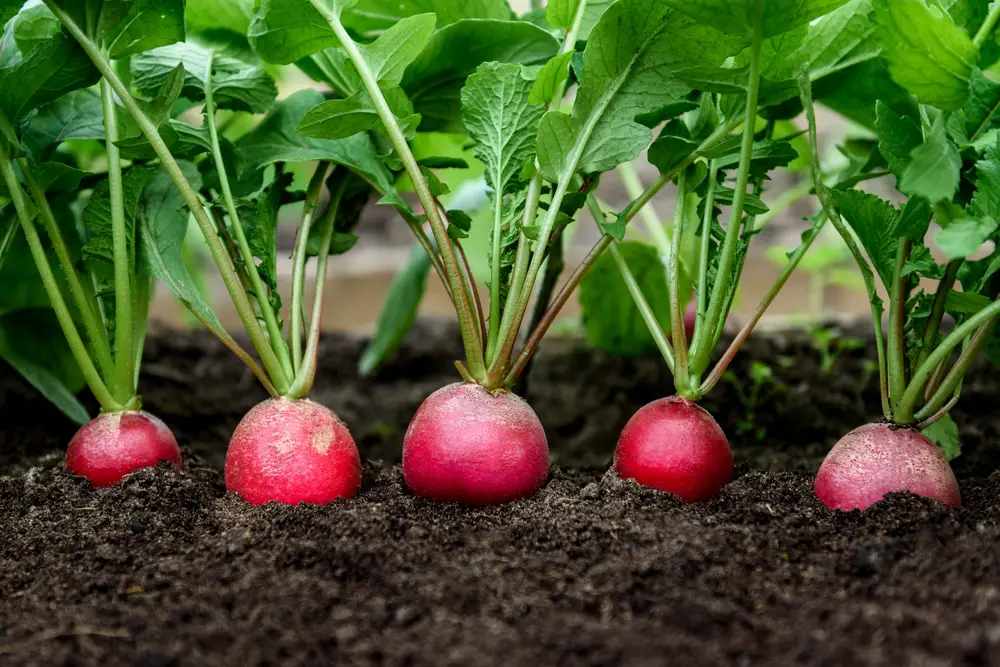
Quick facts: Direct sow radishes, and they will be ready in 30 days.
Radishes? Yes, radishes.
I always include them in my garden because they’re ready to eat in about a month, you can use them in a variety of dishes, they are nice to look at, and they double as a deterrent to some garden pests (namely, cucumber beetles).
Radishes also have a nice spiciness for those who appreciate that kind of thing. Additionally, you can oven-roast them if you prefer milder food.
As I harvest my radishes, I seed more, so I have a steady supply on hand throughout the season. They tolerate heat as well as cool temperatures.
2 – Leafy Greens
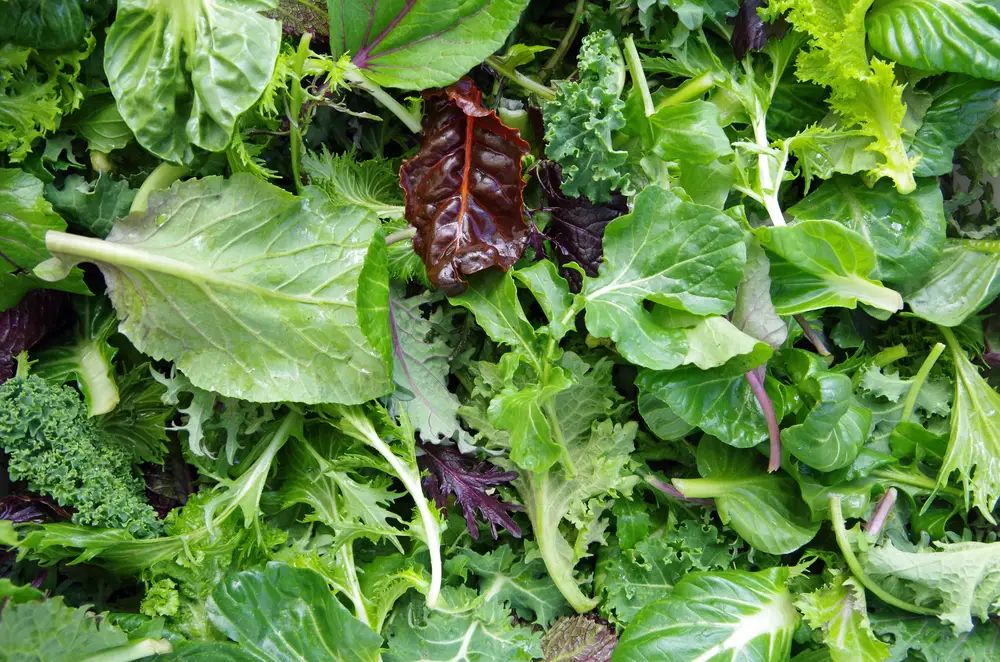
Technically, a category of vegetable instead of one specific plant, leafy greens are among the first seeds I sow each year.
They’re capable of withstanding cooler temperatures, and you’ll be harvesting these within a month.
Let’s start with leaf lettuce.
Leaf Lettuce
Quick facts: Direct sow leaf lettuce, and it will be ready in 30 days (some even less).
I plant lettuce early since I like to start eating from my garden as soon as possible. Lettuce prefers cool temperatures. Though it won’t grow quickly, once established, it will tolerate cold, even below freezing for a day or two.
Leaf lettuces are what you call “cut and come again” plants. This means you can harvest it multiple times.
Wait until leaves are at least 4 inches tall, cut leaves at the base, and enjoy. You will notice regrowth from the roots you left intact in a week or so.
I typically remove lettuce entirely by the time I have harvested it 2 or 3 times. This coincides with the seasonal increase in temperature and prevents the lettuce from going to seed and getting bitter in flavor. By the time I remove my leaf lettuce, the head lettuce is almost ready for harvest.
By mid-August, when the days are noticeably getting shorter, and temperatures are cooling somewhat, I sow more leaf lettuce for the fall.
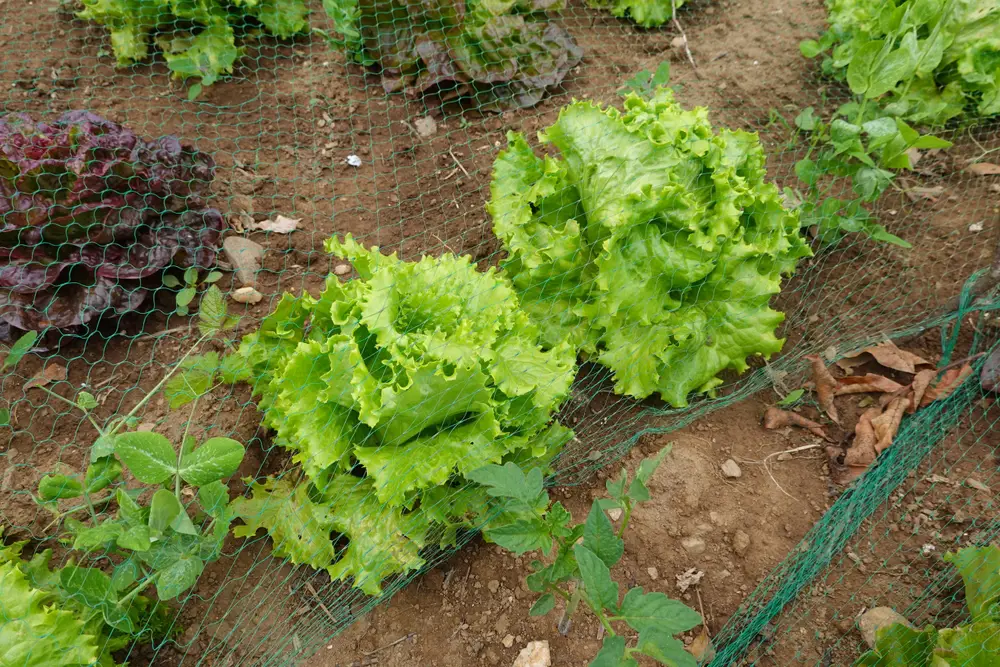
Head Lettuce

Quick facts: Direct sow head lettuce, and it will be ready in 2-3 months.
I plant a row of head lettuce at the beginning of the season and another row two or three weeks after.
You have several varieties to choose from, but all fit into the categories of cos (romaine), butterhead (bibb), or crisphead (iceberg).
Lettuce prefers cooler temperatures and can be hard to grow in the heat of summer. So, I make sure to choose heat-resistant varieties and plant them somewhere they will receive partial shade from adjacent plants as they grow.
Mulching around head lettuce can also help to retain water and keep the roots cooler.
Spinach

Quick facts: Direct sow spinach, and you can begin harvesting it in 6 weeks.
Similar to lettuce, spinach likes cooler temperatures. I plant mine early and usually stop growing it toward the end of June.
Another cut and come again plant, you can get many harvests from the same plants. Cut outer leaves from the base of the plant as soon as they are the size you want to eat.
You can expect your spinach to bolt (go to seed) as temperatures warm. You can stave this off for a while using the same methods as with lettuce (shading, mulching). However, I remove those plants quickly once it does because it makes the spinach intolerably bitter.
Once temperatures start cooling again in August, I sow some more spinach to eat throughout the fall.
Kale
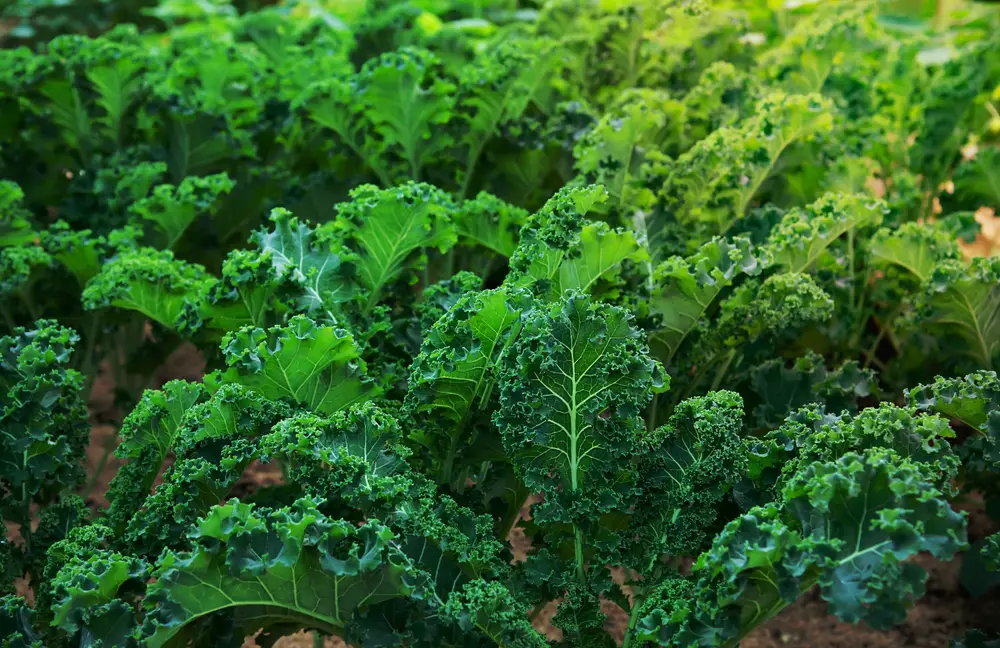
Quick facts: Direct sow, and you can start harvesting in 2 months.
Kale is a wonderful crop to grow. Even if you don’t love it now, it may quickly become one of your garden favorites because it is so versatile.
Though kale prefers cooler temperatures, once the roots are established, it will grow in a wide range of temperatures without much effort. If you stick to harvesting the bottom leaves, the plant will continue growing upward and produce more leaves all season.
You can eat kale raw or cooked, use it in a smoothie or as a juicing staple, and easily freeze or dehydrate it for later.
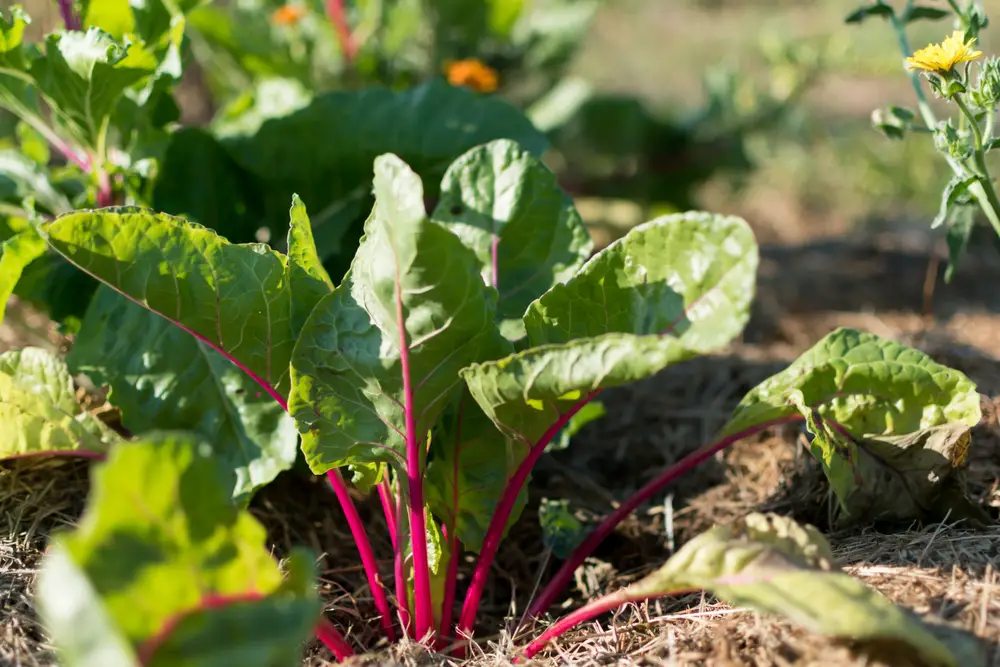
Chard
Quick facts: Direct sow, and baby leaves will be ready in a month, with the rest ready in 2 months.
Chard, or Swiss chard, is another highly versatile leafy green. It behaves similarly to kale in your garden in that you can plant it early, and it will tolerate summer heat.
You can harvest outside leaves multiple times. I have had chard plants survive the winter and enjoyed new growth from them for a second season!
You’ll usually want to cook chard. However, the smaller baby leaves are a good addition to salads.
My favorite variety to grow is the colorful rainbow chard, featuring pink, purple, orange, red, yellow, and white stems and veining on each leaf. Make sure to plant them somewhere you will be able to appreciate the ornamental quality.
3 – Peppers
Whether sweet or spicy, peppers are truly delightful to grow at home.
Peppers are slow-growing, heat-loving plants. For these reasons, I recommend you purchase seedlings and transplant them to your garden.
This way, you can protect them until temperatures warm adequately. 59°F (15°C) overnight is the lowest temperature I would expose them to. Anything lower can interfere with flowering or the size and quality of your peppers.
When it is finally warm enough, and you have transplanted your peppers, I suggest pinching off any flowers for the first couple of weeks. This allows the plant to direct more energy to developing healthy and vigorous roots right after you have moved it. It may seem counterintuitive, but I’ve noticed if I do this, the plants grow better and yield more for the rest of the season.
As with leafy greens, you have a couple of options for growing peppers.
Let’s start with hot peppers.
Hot Peppers
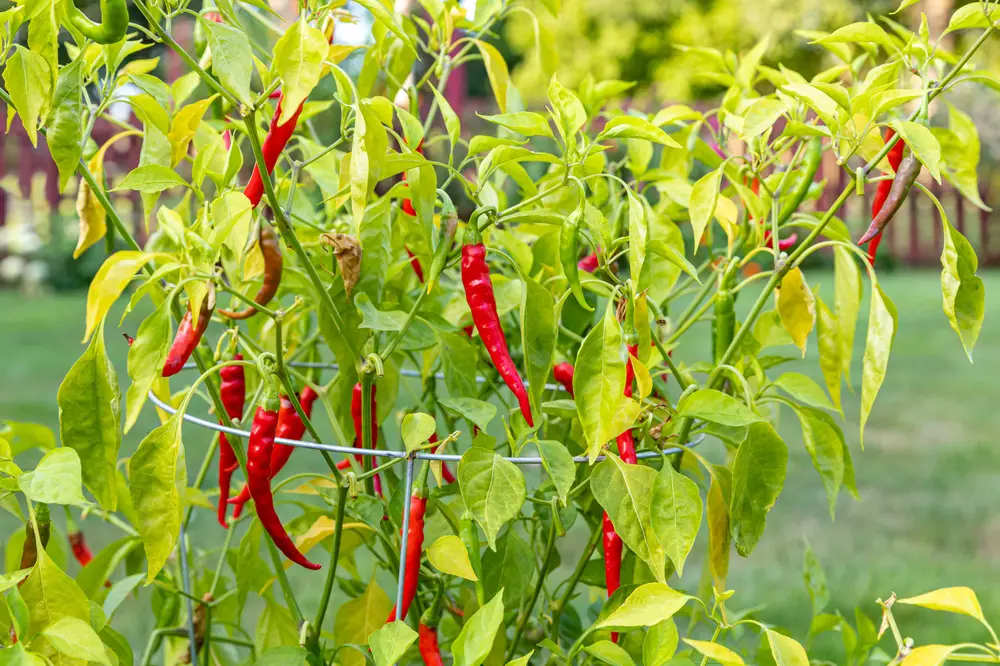
Quick facts: Plant seedlings, and they’re ready for harvest in 3 months and beyond.
Hot peppers get spicier the longer they are left on the plant. Though you can harvest and use them while green, you will enjoy the depth of flavor each plant has to offer if you leave the peppers to turn color and mature on the plant.
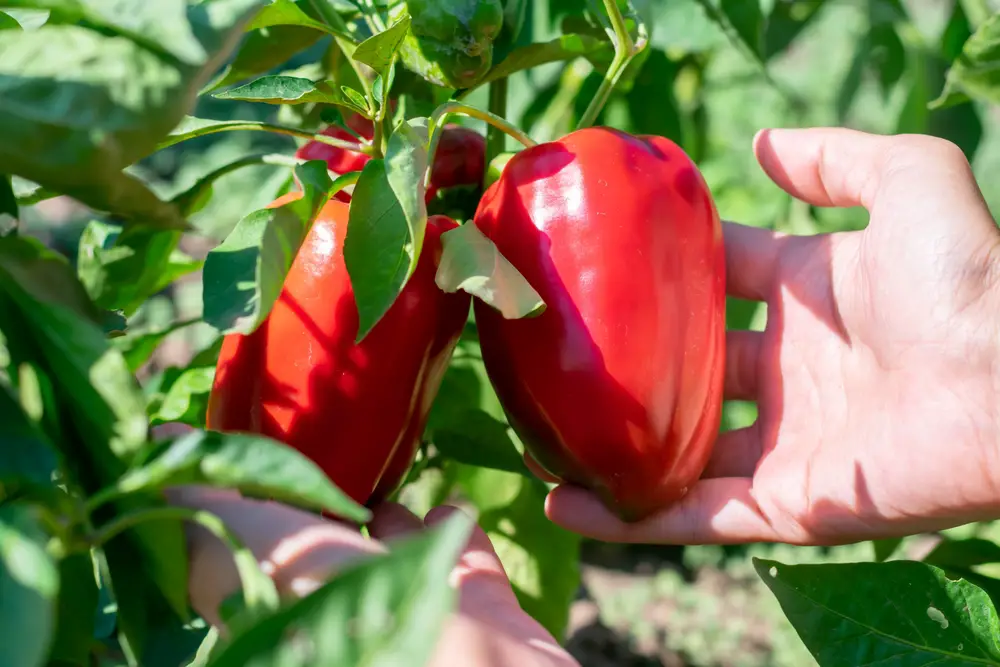
Sweet Peppers
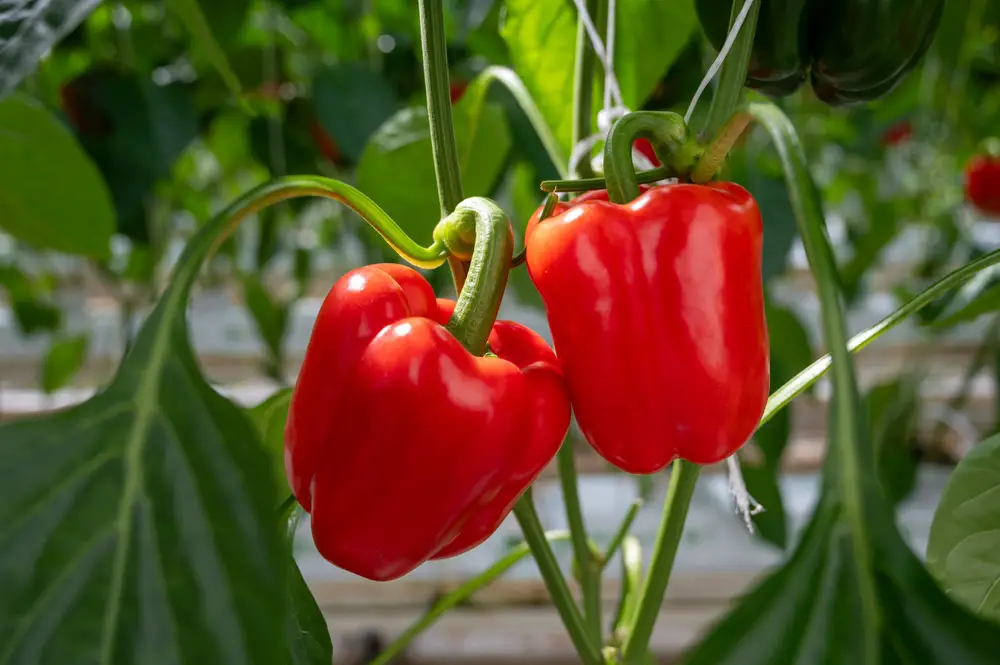
Quick facts: Plant seedlings, and they’re ready for harvest in 2 months and beyond.
Depending on the variety, sweet pepper plants can be a couple of feet tall. It’s best to add stakes or cages to support the plant (if needed) when it is full of peppers.
Though harvesting peppers promptly encourages the growth of more peppers, they become sweeter and more vitamin-rich the longer they stay on the plant.
All bell peppers are first green and then turn the color of their specific variety, which could make them red, yellow, orange, or purple at maturity.
4 – Carrots
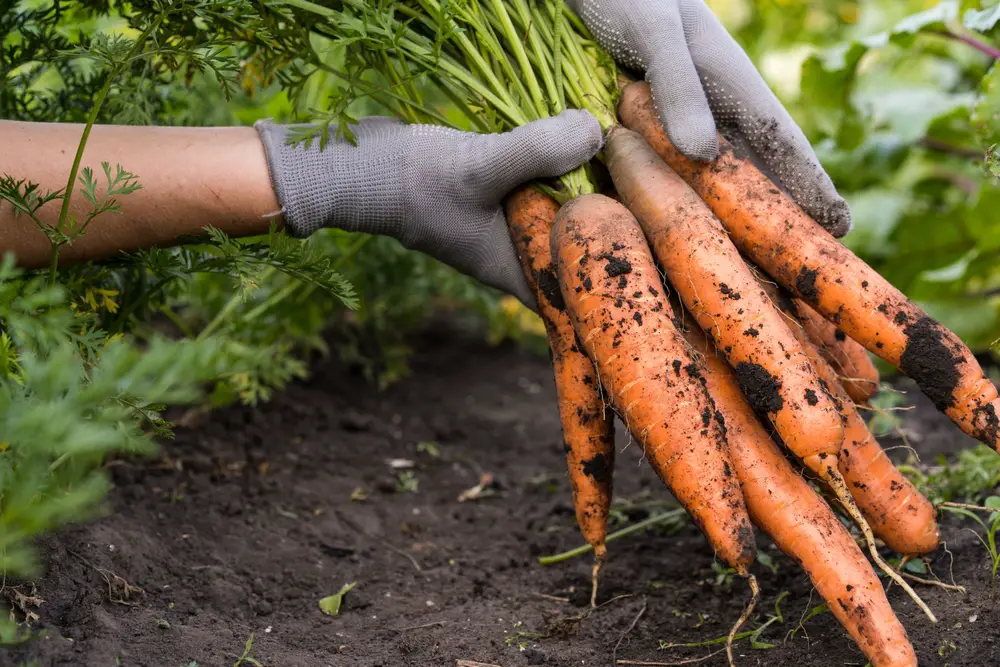
Quick facts: Direct sow, and they’ll be ready in 2.5-3 months.
You will not eat better carrots than homegrown ones.
Relatively simple to grow, carrots do take a bit of time to germinate and can be finicky getting started. The trick is to make sure you keep moisture in the top of the soil for those first few weeks. I just make sure I water every day for a minute or two if there hasn’t been rain.
Once you see those feathery, telltale leaves poking up through the soil, the rest of the process for growing your carrots is fairly standard.
Depending on how thickly you sowed the seeds, you may need to “thin” them. This refers to gently removing some plants to allow the remaining plants adequate room to grow.
If you do this, first refer to the seed package to see how big the variety you are growing gets and thin accordingly. Feel free to add both the tiny, removed carrots and their tops (which are also edible) to your next salad.
5 – Beets

Quick facts: Direct sow, and they’ll be ready in about 2 months.
Beets are relatively quick to grow, and many consider them a “superfood.” A particularly good source of fiber, folate, and manganese, beets have a little bit of everything your body needs nutritionally each day.
You can plant them up to a month before frost in your area.
Both the root and leaves are edible. If you are harvesting beet greens while still growing the root, wait until plants are at least 4 inches tall and do so sparingly. Remove one or two of the largest leaves, and be careful not to harm the central leaves to ensure continuous growth.
In addition to growing in cool temperatures, beets tolerate heat once established. But don’t leave them in the ground for too long. Once they have matured, they will become increasingly tough.
6 – Potatoes
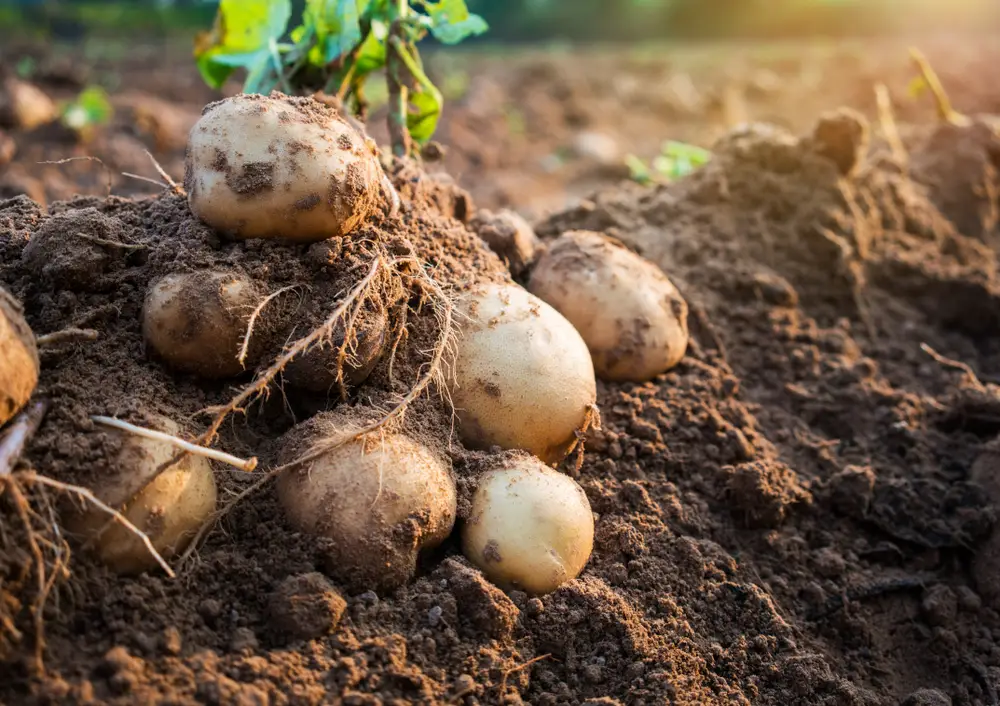
Quick facts: Direct sow, and they’re ready for harvest in 3-4 months.
You can plant potatoes early. They go through four stages of growth: sprout development, vegetative development, tuber initiation, and tuber bulking.
To be a good potato gardener, you need to keep the moisture consistent and cover the tubers growing underground (otherwise, your potatoes turn green).
You’ll do this by “hilling” your potatoes. When the plants are about 6 inches tall, you will gently mound the surrounding soil around the plants’ stems. This covers the entire area the potatoes are growing with an extra layer of soil.
If your potato plants develop flowers (they don’t always), you can clip them off to keep energy directed to the tubers.
About 3 months after I have planted potatoes, I will reach into the soil and take a few. This lets me enjoy some before they are completely mature and know what size they all are.
New potatoes are an excellent source of vitamin C. The majority of the nutrients are in the skin. Leave it on!
7 – Peas
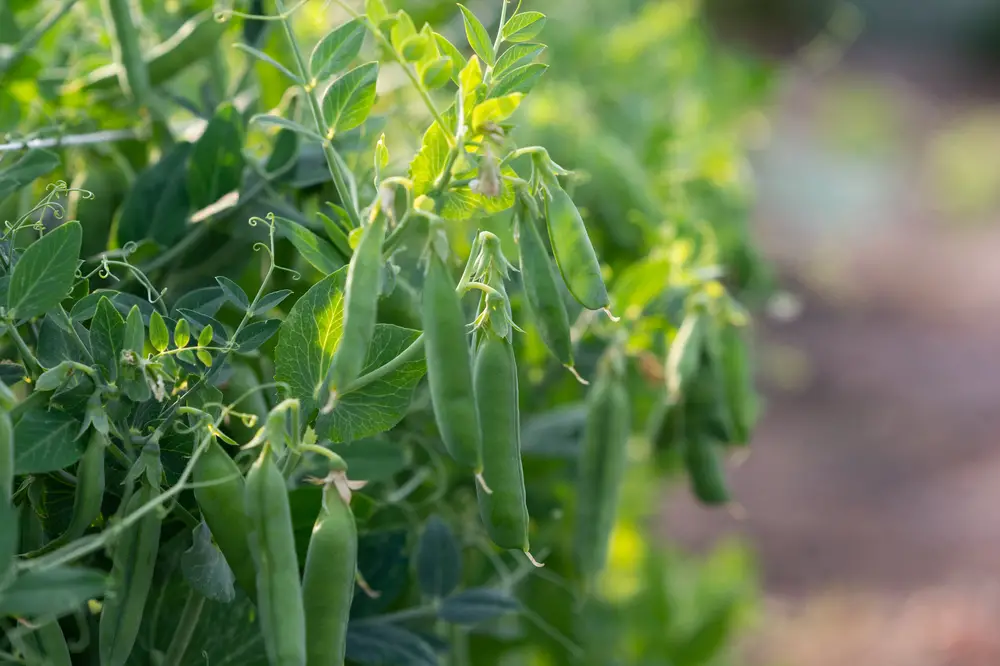
Quick facts: Direct sow, and they’re ready in 2 months.
Peas are another vegetable needing full sun but preferring cooler temperatures. Plant them as soon as the risk of frost has passed.
There are several recommendations for soaking seeds before planting. Peas are the only seeds I soak.
I put them in a small dish and cover them with water overnight. The rationale is that it speeds germination up slightly.
Honestly, I do this because this is how I was taught to grow peas, and it stuck. I know plenty of gardeners who successfully grow their peas without soaking them. But I will say, one year working as a therapeutic horticulturist at a farm, I did not soak my pea seeds, and it was the only time I had trouble with germination!
Peas need support as they grow, so I like to install whatever I am using and then plant the seeds.
Water them consistently and harvest them when they are ready.
You can expect snap peas (edible pods) to be ready about a week after flowering.
Others (peas that need shelling) will be ready about 18 days after flowering.
You can always feel the pod or open them up to see the peas’ size. You don’t want to leave them on the plant too long, or they will begin to become starchy.
Your plants should produce for several weeks. Once the heat of summer sets in, your pea plants stop producing peas. Some people leave them and see if they can get more peas later in the season. I clip mine back and leave the roots in the ground to feed the soil.
8 – Squash
Squash can be a lot of fun to grow!
The plants can get surprisingly large, so make sure you have lots of space. They can also be surprisingly heavy producers, so unless you really like a specific type of squash, you likely don’t need more than one or two plants for your vegetable garden.
Let’s start with summer squash.
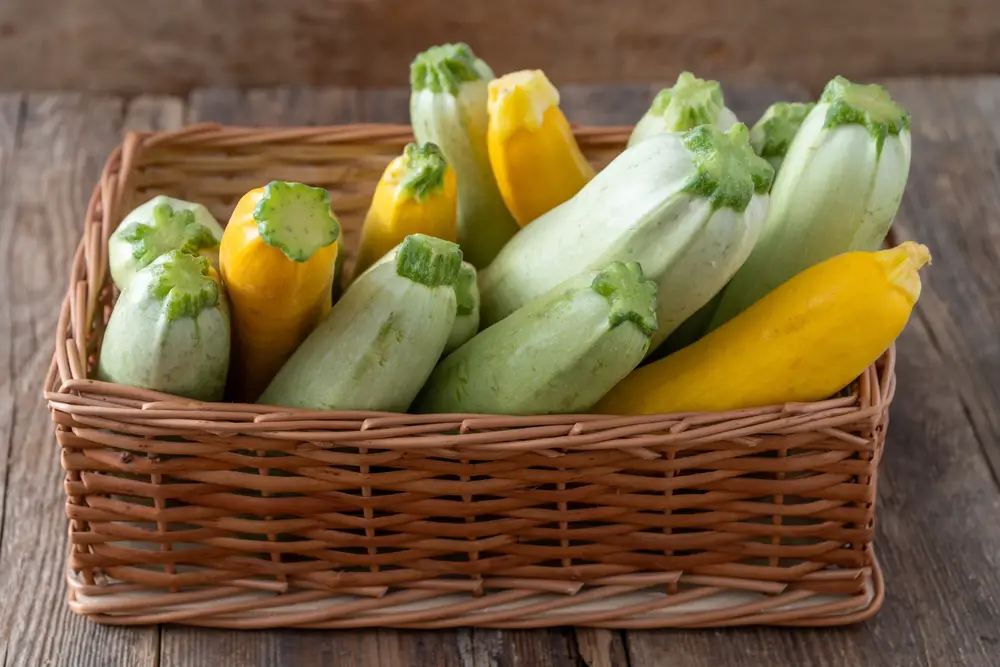
Summer Squash
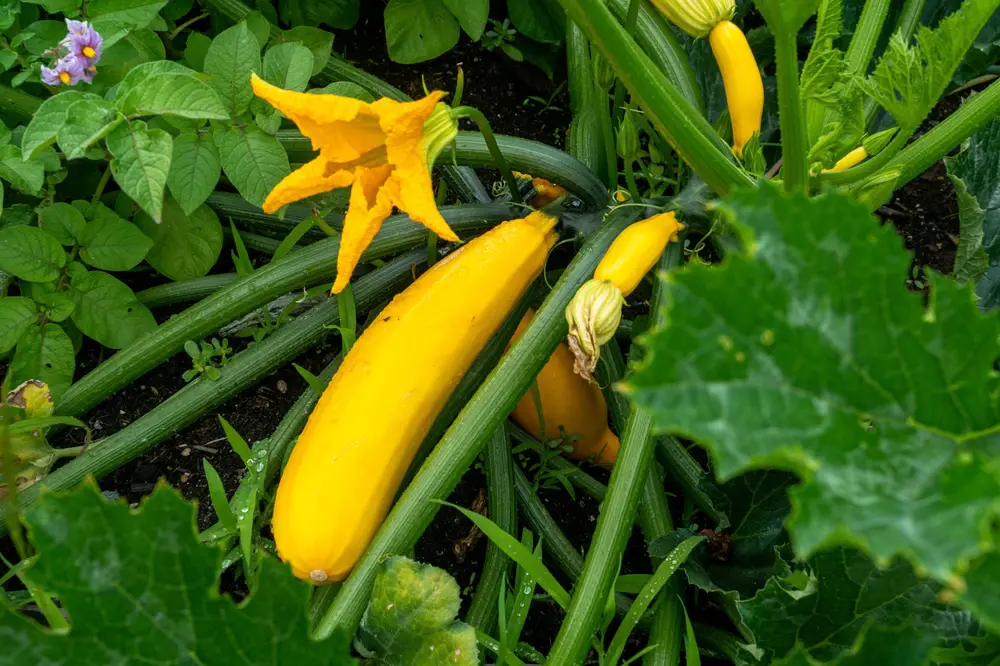
Quick facts: Plant seedlings, and they’re ready in approximately 2 months.
Summer squash are a thin-skinned squash. Use within approximately 2 weeks after harvesting.
Zucchini, pattypan, and crookneck are just a few of the summer squashes available to you.
Hold off on transplanting squash plants until your area is warm, though. The evening temperature should be consistently above 55°F (12.8°C).
Once you’ve planted your summer squash, consider mulching underneath their leaves (I use straw or grass clippings). This helps retain moisture in the soil. It also protects the leaves and any developing squash from too much moisture or soil-borne pathogens.
Once squash plants start producing, check daily and harvest regularly. Harvesting them when they are smaller ensures the best flavor.
Squash can grow 1 or 2 inches per day at the height of their production! The zucchini you thought of harvesting on Monday can be the size of your forearm by Thursday, but it won’t be as delicious.
If you are interested in harvesting the flowers to eat, I suggest choosing the male flowers.
A female flower will have a slight bulb where it attaches to the stem (this becomes the squash). Male flowers don’t. Ensure you leave some male flowers as well to ensure pollination occurs.
Prune back leaves as needed all season. Good airflow is essential for squash. I like to cut leaves back to the main stem, especially if they are attached below flowers or the growing squash.
Production will peak in August and taper out as the days get shorter.
Winter Squash

Quick facts: Direct sow, and they’re ready in 3-4 months.
A winter squash has thicker skin than summer squash, and you can store it in cool environments, sometimes for several months.
Acorn, spaghetti, butternut, and delicata are a few of the varieties of winter squash available to you.
Winter squash plants are vining and can grow several feet. Each will provide you with several squash. Harvest when the stems have grown woody, and the skins are hard.
Adequate space and good garden hygiene (pruning away dead or decaying leaves) are essential to healthy squash development throughout the season.
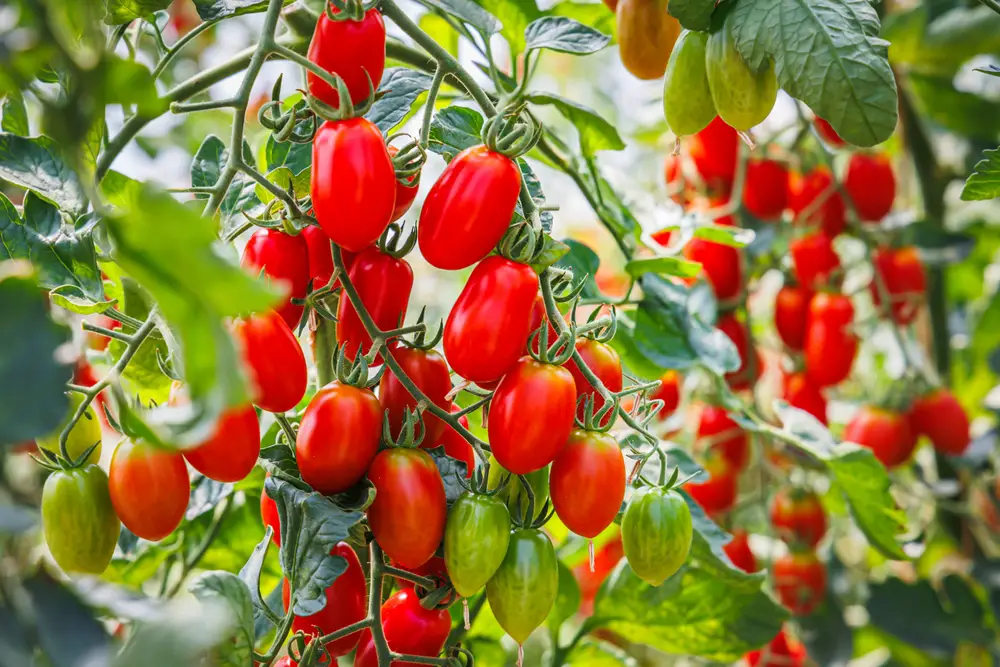
9 – Tomatoes
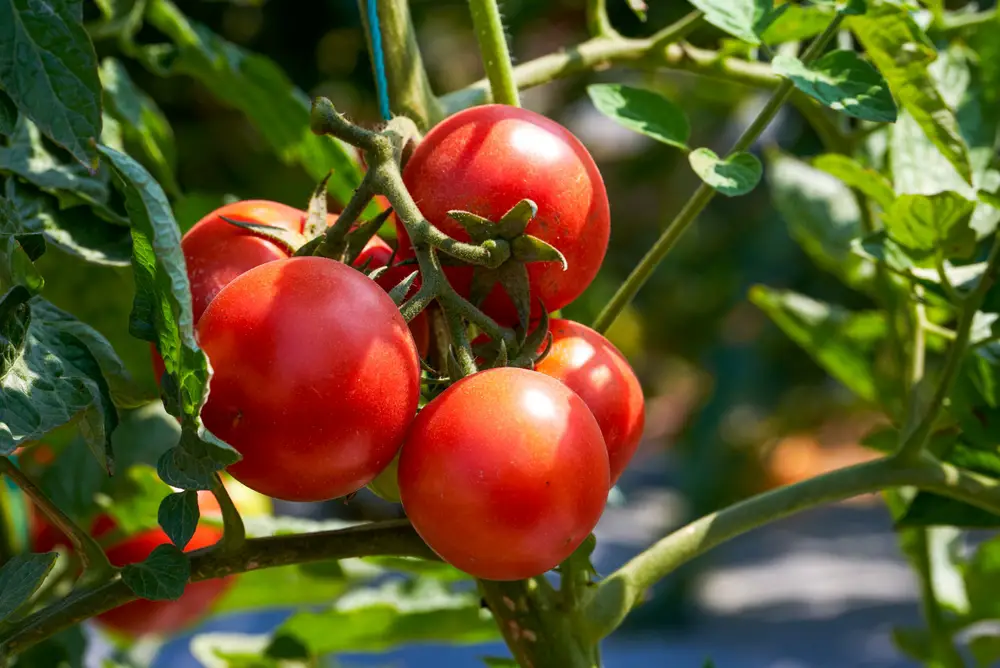
For many, tomatoes are the quintessential food garden plant. They need rich soil, deep planting, and plenty of sun.
Neither the hardest nor the easiest to grow, whatever attention you give your tomatoes reaps rewards. Some gardeners dedicate their lives to mastering them. Choose a variety or two you like and see how it goes.
Tomatoes are heat-loving plants you should plant out in your garden when evening temperatures are consistently above 55°F (12.8°C).
Plant their roots deeply into the soil. Pinch off any flowers for the first two weeks after you transplant to encourage root growth.
Tomatoes fall into two categories based on their growth habits: determinate and indeterminate.
Let’s start with determinate tomatoes.
Determinate Tomatoes
Quick facts: Plant seedlings, and they’re ready in 2 months.
Determinate tomatoes (Roma, San Marzano, and Bush Early Girl, to name a few) are compact bush tomato plants that grow to a specific size. Afterward, they set to work producing tomatoes for a specific window (between 2 weeks and 3 months, though the average is 1 month, depending on the variety).
The earliest ripening tomatoes are determinate.
Their predictability can be helpful if you’re interested in preserving large quantities of tomatoes.
Though determinate tomatoes do not typically need pruning, they will benefit from staking or the support of a tomato cage when laden with ripening tomatoes. Be sure to install your chosen support when transplanting tomatoes so you don’t risk harming their root systems later.
Indeterminate Tomatoes
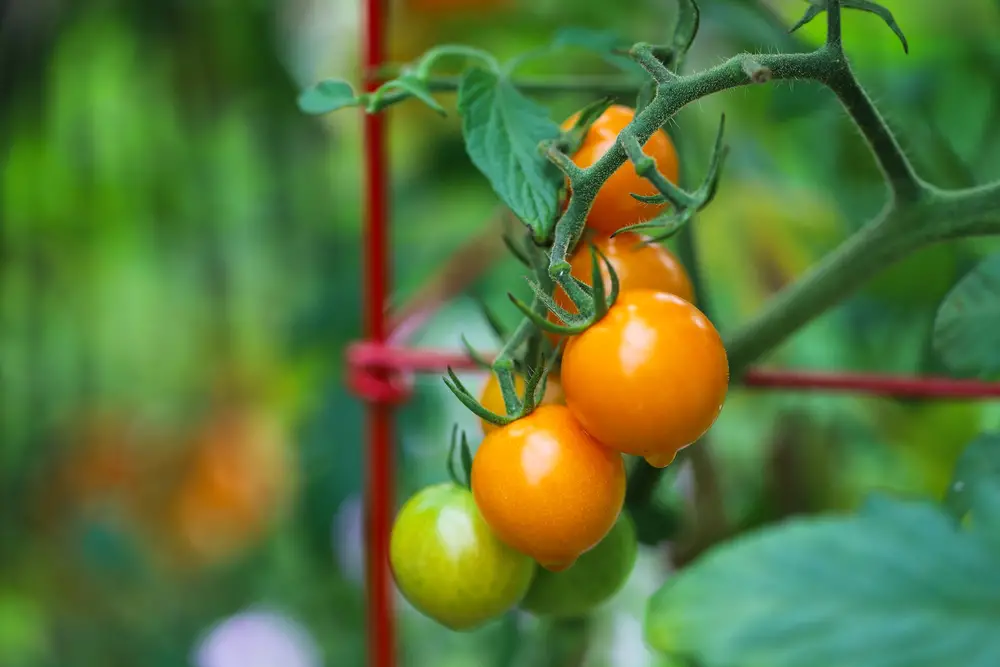
Quick facts: Plant seedlings, and they’re ready in 2.5 months and beyond.
Indeterminate tomatoes are vine-growing tomatoes that will continue to grow new foliage and tomatoes until frost or disease kills them.
Unlike determinate tomatoes, indeterminate varieties are sprawling, require support while growing, and do best when pruned. They produce tomatoes throughout the entire growing season and are best if you want a consistent supply of tomatoes all season long.
There is a huge variety of indeterminate tomatoes available to grow. In other words, there’s something for everyone.
10 – Onions
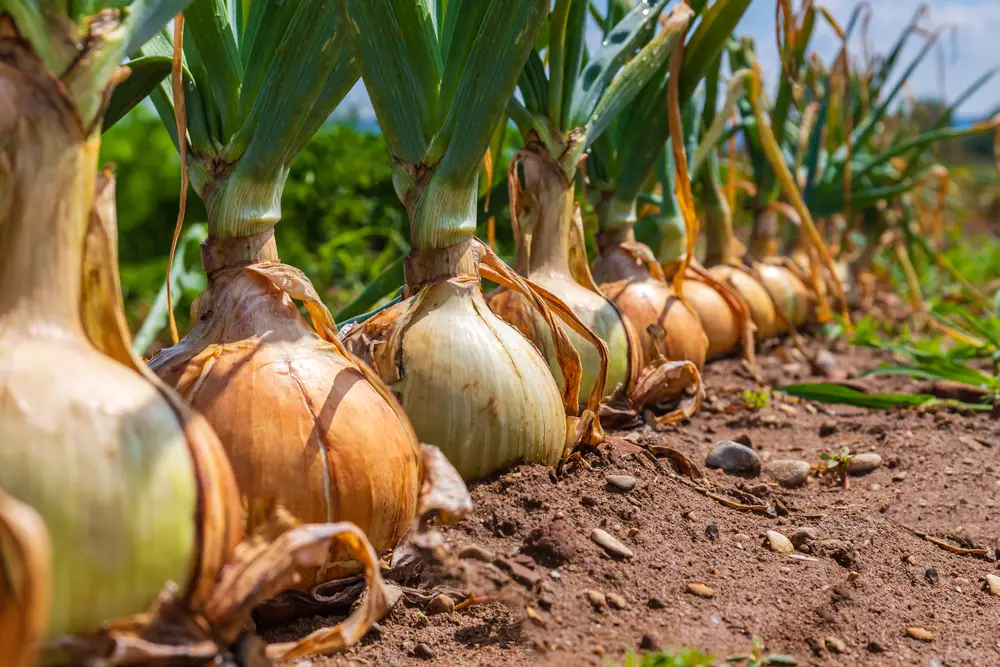
Quick facts: Plant seedlings, and they’re ready in 3 months and beyond.
The best reason to grow onions is the taste, which ranges from sweet to pungent.
Since onions are slow growers, I suggest planting seedlings. Transplant into your garden as soon as you are ready.
If you want your onions to bulb and grow to full size, they must have at least 4 inches between them.
If you want to use some as green onions as they grow, you can plant them closer and harvest every second plant during the growing season. This will free up space between the onions when they need it most.
The sweet varieties (Walla walla) are delicious. Unfortunately, they don’t store very well, and you must consume them within weeks of harvest. Stronger-flavored onions contain more of the compounds that allow you to store them for several months.
But remember, as they say, “The more you weep, the better they keep.”
11 – Cucumbers
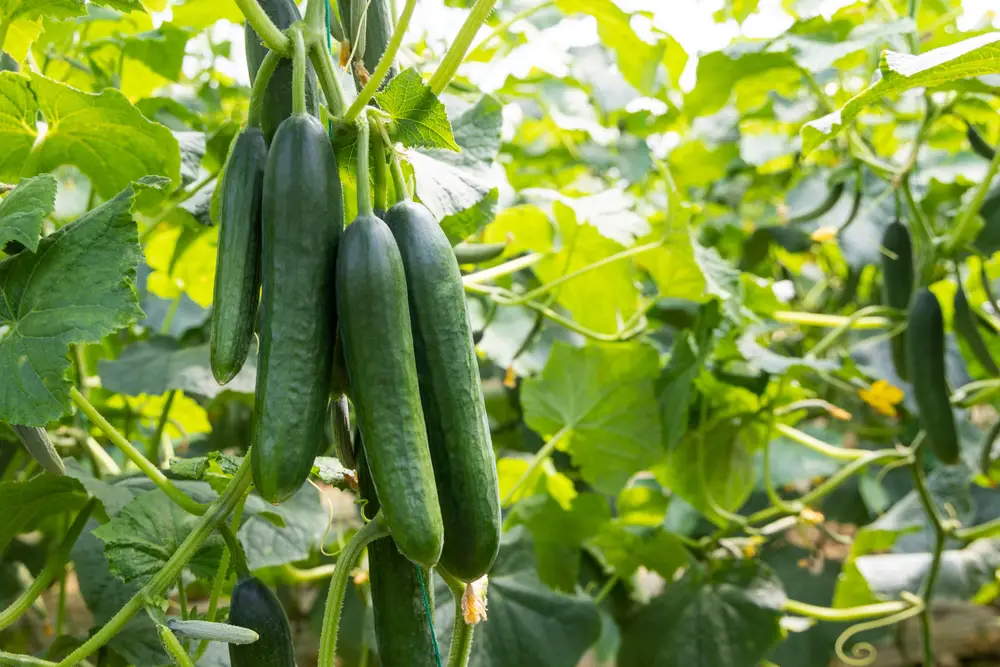
Quick facts: Plant seedlings, and they’re ready in 2.5 months.
Though cucumbers take less time to produce than some other plants on this list, I still suggest planting seedlings. This is because cucumbers are heat-loving plants that take time.
Transplant seedlings out when daytime temperatures are consistently between 70-85°F (21-30°C).
To successfully grow cucumbers, you need some kind of support for them to grow up and consistent watering. Harvest them as soon as they have reached their mature size or risk them turning bitter.
12 – Beans
Quick facts: Direct sow, and they’re ready to harvest in 2 months and beyond.
Beans are an easy and productive addition to your vegetable garden. They like heat, so wait until air temperatures are in the 65-85°F (18-29°C) range.
Comparable in some ways to determinate and indeterminate tomatoes in their growth habits, beans are either bush or pole beans.
Both kinds are consistent producers and can be a satisfying plant for gardeners at all experience levels.
Bush Beans
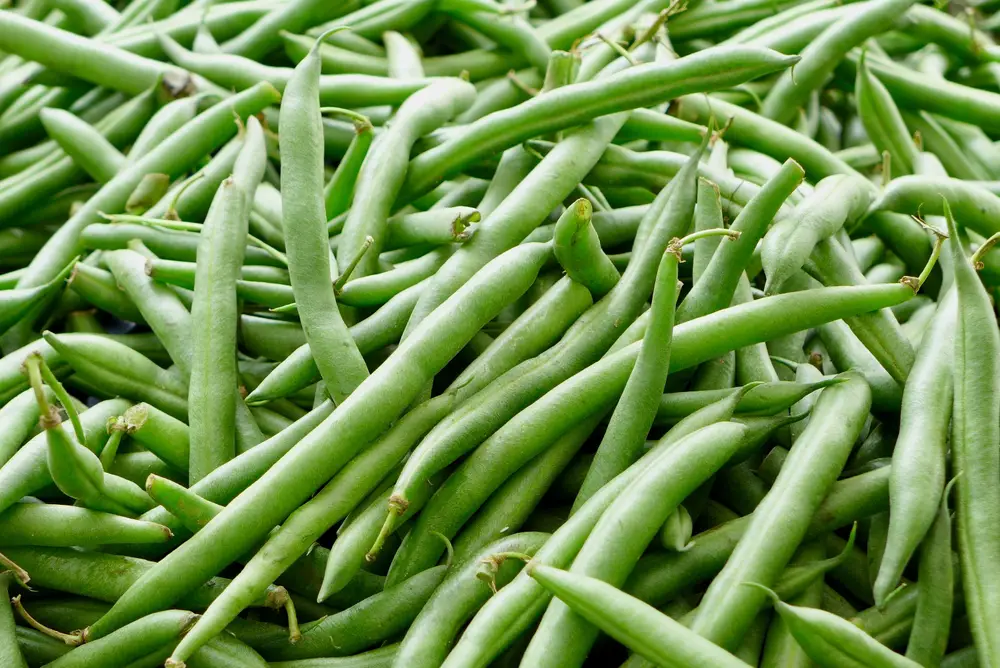
Bush beans are compact and bushy plants that produce beans relatively quickly and all at once. It is possible for plants that have been harvested to continue producing. However, to have a continuous supply of beans throughout the season, you may choose to stagger plantings.
You can choose varieties that are green, yellow, purple, or mottled variations of the three.
Pole Beans
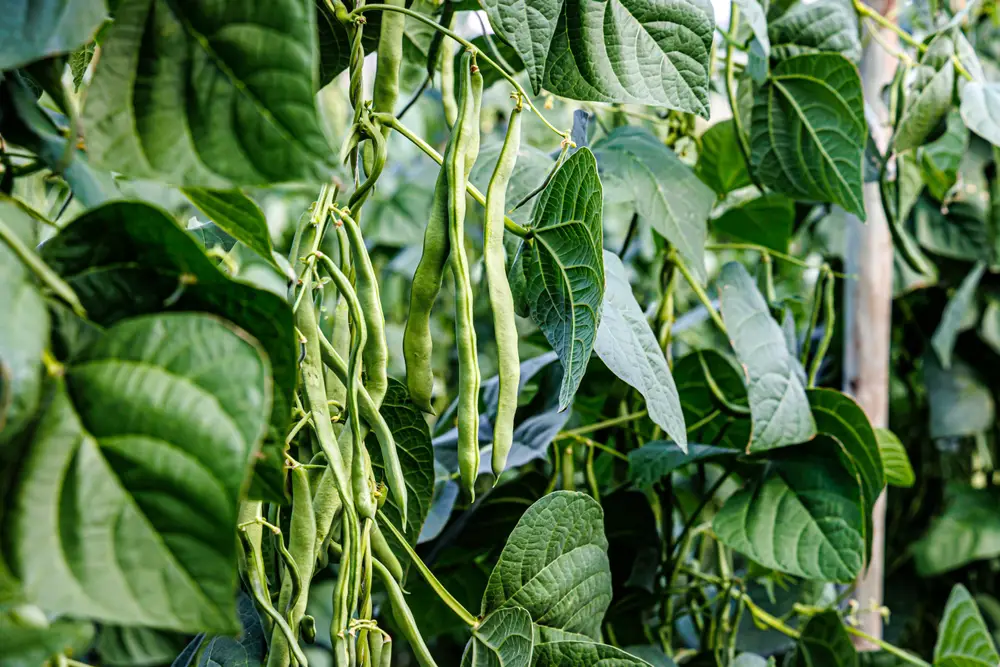
Pole beans are slightly more complicated than bush beans and take a bit longer to mature as well.
Also, pole beans continue growing indefinitely and need support for their growth. Install what you will use while planting.
Harvest these beans as soon as the pods are full. Every couple of days is best. Leaving beans on the plant too long can create tough and bitter-tasting beans.