

Cress may be grown both indoors and outdoors, with or without soil.
It does not require soil to sprout and may grow on cotton wool.
It will grow equally excellent in cotton wool as it will on the ground. It just needs some grip to develop!
Growing cress in cotton wool is a straightforward approach that one can do within the home. Sowing cress is simple, requires minimal attention, and matures in less than 14 days! The process starts by lining a tray or container with moist cotton wool. It is followed by seeds being distributed evenly around the base, about 1-2 inches apart, and pressed into the cotton wool.
The medium is then covered with a cling film and placed on a warm window sill to receive light from attaining maturity. The growth process ends at the stage of harvesting.
The mature cress is snipped off using a pair of scissors, ready for consumption.
Steps in Growing Cress in Cotton Wool

Preparing Tray/Punnet
Cress will grow fast in any container, but a shallow tray or punnet is most preferred to a deep one.
Once you’ve selected the suitable medium, line it with clean cotton wool up to three-quarters.
Then gently break apart the fibers of cotton wool. Wet the wool well without immersing it in water.
Don’t Forget: Leave a 3 cm space between the cotton wool and the top of the tray or pot.
Sowing Cress Seed

Sprinkle the seeds evenly over the cotton wool, about one to two inches apart, while being liberal with the seeds but not too generous (teaspoon full of grain).
Then gently press each seed down.
Check if the cotton wool is still moist, and add a little water if required. Make sure the dampness is even.
Covering the Tray/Pot
Use cling film to cover the tray or a container an inch or two deep. It is ideal since it protects seedlings from hitting a glass ceiling upon growth.
It’s also essential in keeping the cotton wool from drying out by preventing evaporation.
You may grow cress without using a cling film, but you must keep a close check on it since the wool dries up rapidly.
Positioning in Light
Place the tray in a warm, light location, such as a window sill, and regularly check for development indications.
After a day, examine the seeds; generally, there are already somewhat sprouted at this point.
After another day, healthy sprouts should emerge, and the film should be removed.
What To Expect: It will take approximately 14 days before it matures, ready for harvesting.
Indoor Cress Growing Conditions and Basic Care
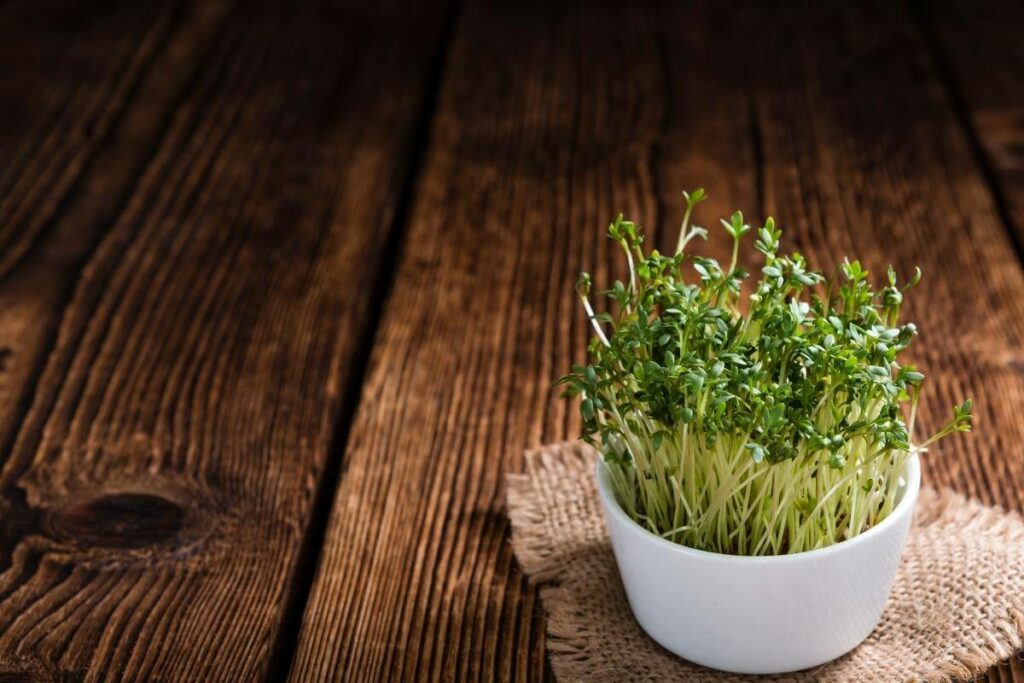
Location and Lighting
This plant is known for its minimum requirements and fast growth rate.
It does not require much light and instead belongs to the shade-loving plant family.
Thus, it will be comfortable at home, even on a window sill.
Optimal Temperature
Seeds may germinate at over 5°C; however, the optimal temperature for cress growth is 10-18°C.
The plant is damped with cold water, and the room is ventilated to maintain this temperature.
Water
It’s a good idea to submerge the seeds before sowing to stimulate fast germination.
It would help if you sprinkled the cress seedling with water every day while it grows indoors in cotton.
It is pretty simple to care for this salad:
- water it regularly and occasionally
- spray the crops once or twice a day
It is preferable to use a sprayer to saturate it with water paying attention to the leaves, including the stems, to make them more tender and fragrant.
Adjust the humidity level by ensuring cotton wool is constantly wet but not soggy. The most important thing is not to over-dry the cotton.
Whenever you forget to water the cress, they will tumble down quickly.
Make sure you re-moisture the cress within a day, and they will recover. You can draw out the stems for lack of moisture; however, the taste may be lost.
The leaves may turn yellow and acquire an excessively bitter taste. The worst outcome would be a leaf fall.
When Is Cress Ready to Harvest?
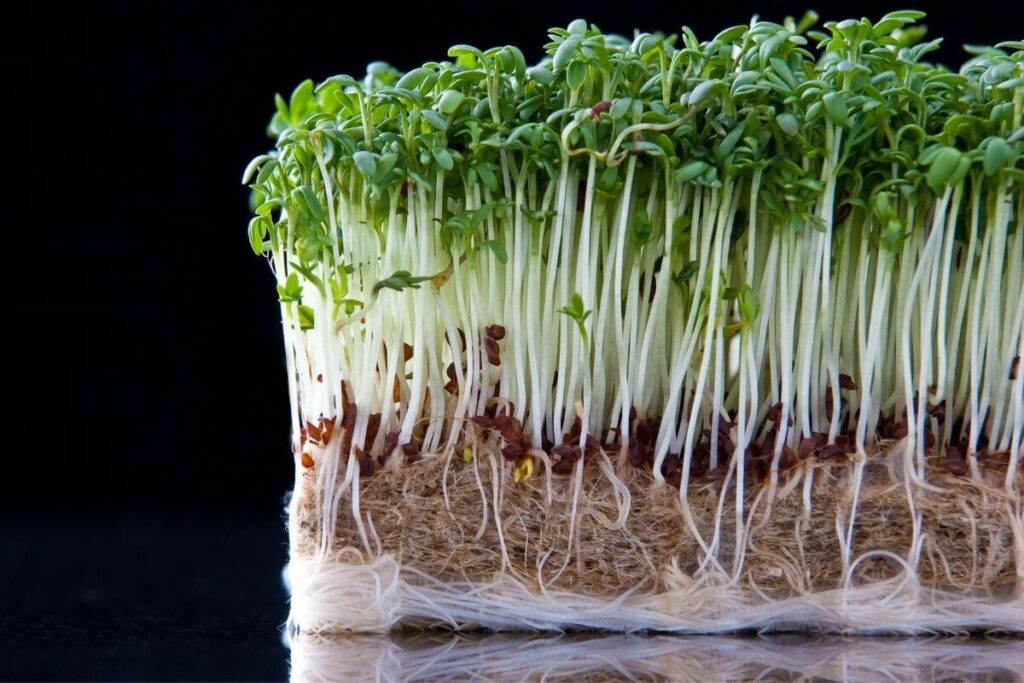
Fourteen days after sowing, the cress growing on the window sill will be ready to be harvested.
Cress is clipped after the cotyledons or when the first leaves emerge. Depending on the type of cress you’re growing, it’s ready for cutting when it reaches 11/2 to 2 inches in height.
Cress is most delicate during the seed-leaf stage.
As a result, you should harvest it as soon as possible using a pair of scissors to snip off the cress’ shoots.
Therefore, pick cress before the blooms develop since the scent of the plants fades as the blooms bloom.
The perfect time to cut cress is in the early morning when the leaves have a high concentration of essential oils.
Consume cress as soon as possible after harvesting. Cress tastes best when it is harvested fresh.
It has a limited shelf life and loses some of its aromas after only a few hours.
So, pick as much cress as you can consume in a short period. Cress isn’t always suitable for drying or freezing.
What Are The Benefits Of Indoor Planting Cress?

It Can Serve as Inspiration
Cress is great, especially when you want to do something with your children.
Because it is simple to plant, you can use it as a good experiment with the children to show them all the things plants need to grow.
Reduces the Chance of Illness
Cress plants filter the air to give us a cleaner and more breathable space.
The plants’ filtering process lowers the risk of respiratory problems, one of the most common causes of colds.
With plants inside your home, you can rest easy knowing that you’re breathing clean and fresh air.
Positive Effect: Having plants around can also be a form of therapy to ensure our mental wellness stays healthy. It also calms those who are stressed and helps meditation to become more meaningful.
They Help Purify the Air
Keeping plants indoors does its work of ridding the air around you of toxic chemicals such as formaldehyde or benzene.
It also raises the air’s humidity by releasing water in the form of moisture vapor in the atmosphere.
With this fresh air, you’ll find it easier to breathe. You will have peace of mind knowing that pollution is being filtered within the house.
Steps In Growing Cress in a Jar
Glass is suitable for growing cress because it’s easy to clean, won’t leech anything or react, is waterproof, and looks great.
To successfully grow garden cress indoors on soil or cotton wool using a jar, follow the step-by-step instructions below:
What you will need:
- Cotton wool or sterile soil
- Cress seeds
- Jar (wider at the top and narrower at the base work best)
- Felt tips for decorating your jar
- Spray bottle
- Cling film
- Scissors
Get Your Planting Jar Ready
Cress should grow quickly in any jar.
However, a shallow jar is recommended instead of a deep one since they don’t grow too tall so a shallow jar will be fine.
Then decorate your jar with the felt tips as you desire.
All Non-GMO Heirloom Cress Seeds with Full Instructions
Filling the Jar
Now that the jar is prepared, you can start filling them with your growing medium.
Fill the container with sterile soil. Alternatively, fluff up some cotton wool and fill the jar with enough cotton wool so that it comes up.
Some people use paper towels, and these works just fine.
Moisten
Use a spray bottle to get your cotton wool or soil nice and moist.
However, be sure it is not entirely soaked that it’s completely drenched in water.
Add Cress Seeds
Sprinkle the cress seeds over the base of the cotton wool or soil.
When sowing the seeds, be sure to spread them out evenly to ensure they are not overcrowded.
Rocinha Seed Sprouting Jar Seed Germination Kit for Growing Broccoli, Alfalfa, and Bean Sprouts
It is hard for seeds to germinate and grow roots when there is not enough room for growth.
Press the seeds into the soil or cotton wool.
Mist, Cover, and Wait
Mist the seeds, cover the jar with cling film, and place the jar in a sunny indoor location, such as a windowsill, where it can access enough light to germinate.
These seeds germinate pretty quickly. The seeds will usually germinate within 2-3 days under normal conditions.
Pay Attention: Many factors determine how fast or slow the seeds germinate, such as the temperature, growing environment, and humidity level.
Care for Plants
After the seeds have germinated, make sure to remove the cling film then expose them to sunlight. It would help your cress massively.
This way, they can get enough sunlight to promote their growth, and the leaves can turn green for more nutrients.
Harvesting Down Inside a Jar Can Be Tough
The best method is to remove the entire mass from the jar by grabbing all the stems and leaves with one hand, the jar with the other hand.
Then slightly pull the cress up vertically until the whole thing separates without spilling soil everywhere, then trim.
Using scissors or a sharp knife is the simplest technique to harvest cress. Snip the stalks at the base, leaving the roots on the soil or cotton wool.
After That: Give them a rinse, and they should be good to eat! Cress may be kept in the refrigerator for approximately a week if stored properly.
Final Thoughts
Cotton wool, paper kitchen towels, and tissue paper can all be used to grow cress.
It is typically grown in shallow trays, punnets, containers, or even eggshells, as the plant only needs to anchor its roots and absorb water. Aside from its numerous benefits, it is modest in its care and is pretty easy to grow.
Growing cress is a quick and simple method to employ indoors. It is also a hobby that can engage your children all year round as it can be sown throughout the year.
It’s an excellent method to demonstrate seed to food in a concise amount of time, and the children can watch the entire growing process from the beginning to the end.
Related Articles
- 5 Microgreens That Regrow After Cutting
- How to Grow Chili Plants Faster at Home?
- Arugula Microgreens Vs Arugula