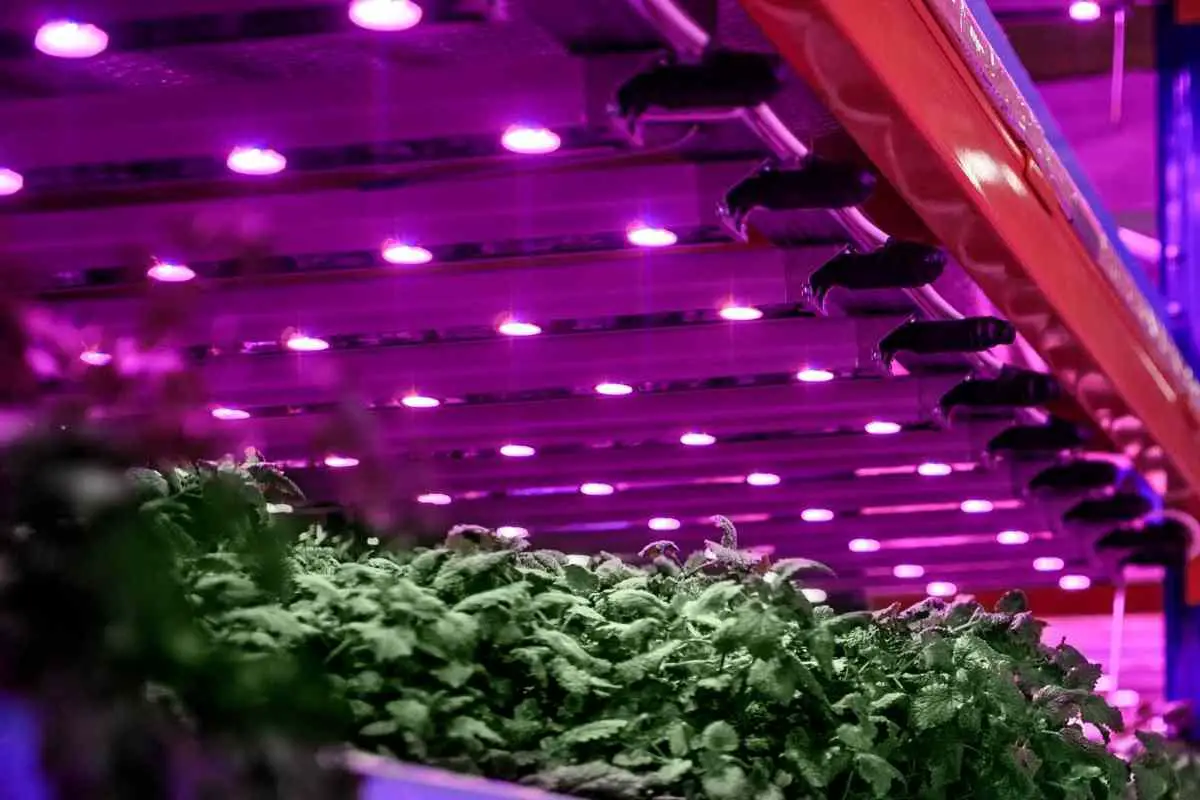
Anyone who has an Aerogarden will be aware of how important the lights are to the growth of your plants.
They supply the plants with most of the light that they need to photosynthesize (with some natural daylight supplementing this).
If you are having problems with an Aerolight not working, you’ll want a quick way to fix this so you can rescue your plants and keep them growing.
Quite a few different things can go wrong with an Aerogarden’s lights, but many involve easy fixes. You may find that your model differs slightly, but most of the below information should be applicable to different versions. If something does not fit with your model, simply skip it and move to the next step.
Step 1 – Unplug Your Aerogarden
Before you start doing anything, check that the power switch is turned off, and unplug the Aerogarden.
Before touching any electronics, you should eliminate the power source, even if the current is not strong.
This ensures you are safe to test the garden.
After each of the steps, you will need to plug the unit back in and check whether you have resolved the issue.
If you have not, make sure you unplug the unit again before you proceed to the next step to avoid any risk of accidents.
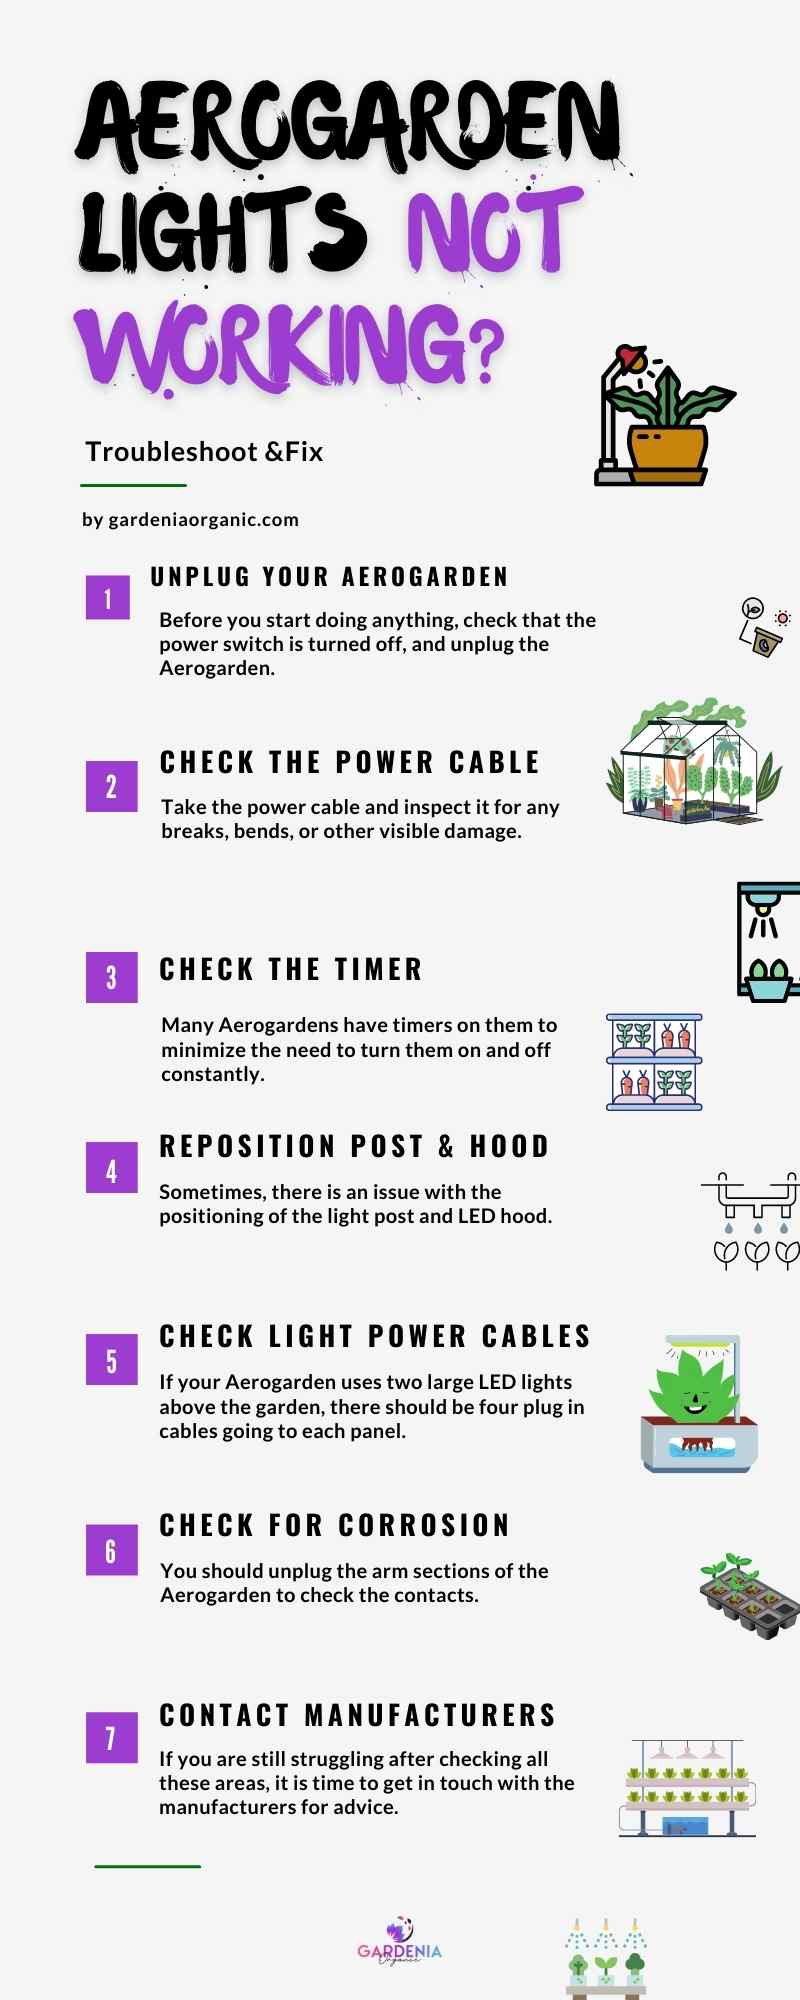
Step 2 – Check The Power Cable
Take the power cable and inspect it for any breaks, bends, or other visible damage.
Look at the plug socket, and the connection point with the Aerogarden. If the cable has been damaged, you might be able to replace it.
Try using a Q-tip to clean any dust out of the connection point on the Aerogarden, and then plug the machine back in, but use a different power socket (in case the socket is faulty).
If this does not help, consider purchasing a new cable to see whether that solves the problem.
Action To Be Taken: If your Aerogarden is still functioning in other ways, it will not be the cable, so you can skip to the following step.
Step 3 – Check The Timer
Many Aerogardens have timers on them to minimize the need to turn them on and off constantly.
If your Aerogarden has a timer switch, make sure that it has not got bumped or damaged, because if so, it may be keeping the Aerogarden off when you think it should be on.

If you can disable the timer, do so and then try plugging the machine back in and testing to see whether you have resolved the issue.
If the timer has malfunctioned, it could be keeping the Aerogarden off even if it does not seem like it should be.
Step 4 – Reposition The Post And Hood
Sometimes, there is an issue with the positioning of the light post and LED hood.
To check this, try taking the light post off the base and disconnecting it from the light hood:
- Check both parts for damage, dust, or any spillage that could be causing the issue, and clean them if necessary.
- When you have finished, reconnect the light post to its position in the base, and make sure that the USB connector is in the correct position and fully plugged in.
- You can then attach the LED light hood back to the top of the post, making sure that it is firmly plugged in.
There are two black lines on the front of the light post, and you should not be able to see these when the light hood is in position, so check this carefully.
Once everything is in place, plug the Aerogarden back into a power socket.
Press the button on the control panel to turn the lights on, and see if this has resolved the issue.
If not, it’s time to check the power cables that run to the lights.
Step 5 – Check The Light Power Cables
If your Aerogarden uses two large LED lights above the garden, there should be four plug in cables going to each panel.
These supply the power to the LED lights, and they are definitely an area to check. They come from the top of the unit, and should dangle down.
The single wire will then split into two, and one will go horizontally across the unit in each direction to reach a corner of the LED panel.
On top of the LED panel, in each corner, you will see a small rubber bung. This needs to be removed so that the cord can be plugged in, and then put back afterward.

Take out the bungs and check that all four cords are in place.
Unplug them and plug them back in to ensure that a wire has not become loose or jolted. Put the bungs back afterward so that you don’t lose them.
Plug the unit in, turn the lights on and see if they work now. If not, move on to the next step.
Step 6 – Check for Corrosion or Pin Breakage
You should unplug the arm sections of the Aerogarden to check the contacts.
Although it may vary slightly depending on the mode, there should be metal pins in the arm sections, often at the top and the bottom of the unit.
Carefully take the unit apart so that you can check these metal pins.
If any are bent, broken, out of line, or corroded, you may need to see if you can buy a replacement section, or contact the manufacturers for advice.
If you cannot get help from them, try and fix the pins yourself:
- Firstly, if the pins are corroded, you may be able to clean them up. You will need an electrical contact cleaner to do this safely, since you don’t want to get liquids inside the unit.
- Brush the connection pin with a toothbrush to loosen any debris, and then spray the contact cleaner onto the pins. With that done, give them a few minutes, and then brush them again.
You can repeat this process as necessary.
Vinegar will also work to clean off corrosion, but it may be harder to apply to the pins if they are set inside the frame. You can use a Q-tip or a toothpick to clean the area if it is easier, but be careful not to damage it.
If the pins have been bent, use a pair of fine pliers to try and straighten them. Work slowly and carefully so that you do not break them.
Alternative: If the pins have snapped entirely, you will not be able to safely fix the unit. Look for a damaged “for parts” version online and see if you can get a replacement that way.
Step 7 – Contact The Aerogarden Manufacturers
If you are still struggling after checking all these areas, it is time to get in touch with the manufacturers for advice.
They may be able to give you further ideas about what to try, or send you replacement parts or a replacement unit.
Alternatively, check out some Aerogarden forums for suggestions on your specific model.
Conclusion
Aerogardens are a great product, but they do depend on their lights to work effectively.
If you are having problems with an Aerolight not working, hopefully our guide has helped you to resolve this issue so you can start enjoying freshly grown food once more.


