If you live in a constrained space where you can’t plant crops in the ground, you need to get creative.
Some of the practical alternatives include planting in gunny sacks or plastic buckets.
This article describes how you can grow potatoes in a 5-gallon bucket and get a meaningful yield.
Why Grow Potatoes in a Bucket?
Besides optimizing space usage, growing potatoes in a bucket has several other benefits:
- First, it is much easier to take care of plants than when they’re planted in in-ground gardens.
- Second, there’s a lower risk of bacterial, fungal, and viral infections because you select the soil composition that goes into the bucket.
That said, the bucket you choose has a significant impact on the quality of your harvest.
It’s advisable to use food-grade buckets since other materials will leach into the soil and affect your crops.
How Can You Find a Food-grade Bucket?
Bakeries and other food processing factories are the best places to get food-grade buckets for free.
Alternatively, you can purchase them from a local supermarket or hardware store.
If you opt for recycled buckets, ensure that they’ve never been used for painting or other chemical-based materials.
If you want to know if the bucket you have is food-grade, look at the recycling number on the outer side of its base. If it is 2, 4, or 5, you can use it.
Some manufacturers usually include a cup and fork sign.
Other symbols for food-grade plastic are:
- HDPE 2
- LDPE 4
- PP 5
- NSF
- FDA
- USDA
PETE 1 is ok, but its quality doesn’t match the others.
Factors to Consider Before Growing Potatoes in Buckets
Besides the bucket itself, here are some factors you need to look out for if you intend to plant potatoes in a bucket.

Sunlight
Potatoes will need a lot of sunlight to grow. Ideally, your plants should receive 7 to 10 hours of sunlight daily.
Since they’re tubers, these plants can withstand the scorching sun.
When choosing a location for your buckets, ensure that it receives adequate sunlight.
Watering and Drainage
Potatoes are susceptible to root rot, as they’re a root crop.
This is why you must drill holes at the bottom of your growing buckets.
These ensure that the water doesn’t get saturated but remains damp.
The recommended watering frequency is twice daily, in the morning and after sunset.
It’s also wise to place your buckets on stones to not touch the ground directly.
From Experience: Besides improving drainage, raising them prevents pests in the ground from climbing up the soil and infesting your crops.
Soil
When choosing soil, go for a type that balances between moisture-retention and quick drainage.

More importantly, it shouldn’t be compact.
You can opt for generic potting soils, but you must ensure that your containers have enough drainage holes.
Mix compost, gardening soil, and peat moss in a 1:1:1 ratio if you like doing things yourself.
Since you will be watering the soil twice daily, the nutrients will likely wash off faster than if you were growing the crops in an actual garden.
For this reason, it’s crucial to mix the soil with fertilizers before you start planting.
How to Grow Potatoes in 5-Gallon Buckets?
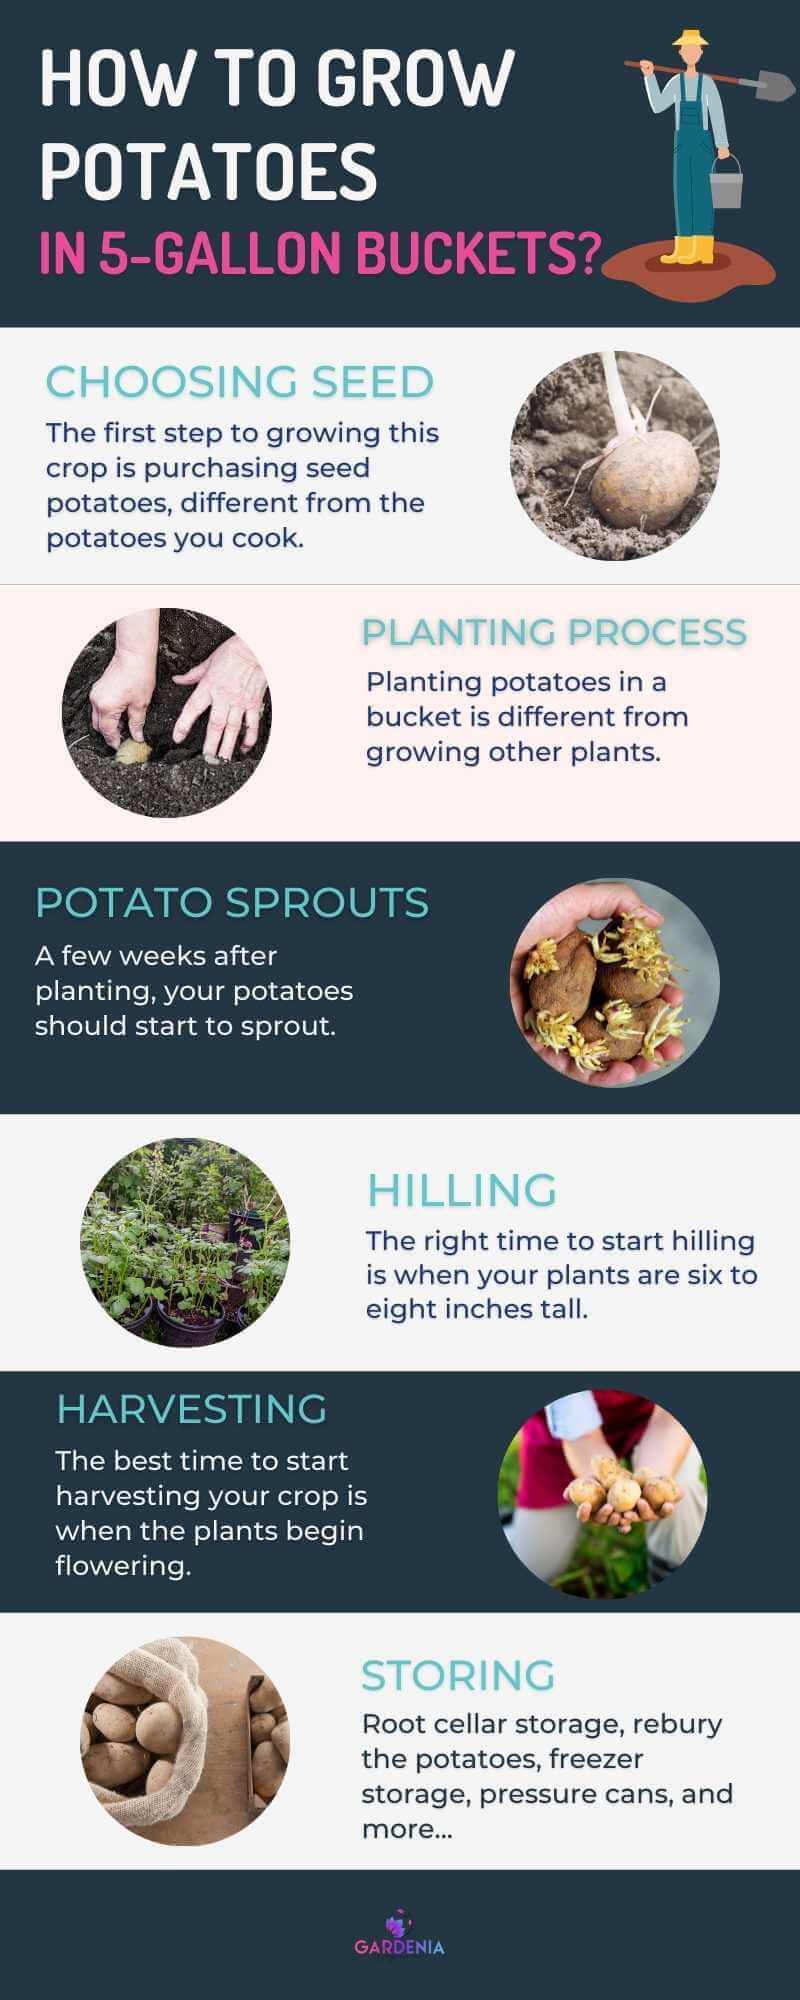
Follow the steps below when growing potatoes in 5-gallon buckets.
Purchase Seed Potatoes
The first step to growing this crop is purchasing seed potatoes, different from the potatoes you cook.
Seed potatoes are disease-free and usually have sprouts, unlike ‘regular’ potatoes. These characteristics make them ideal for planting.
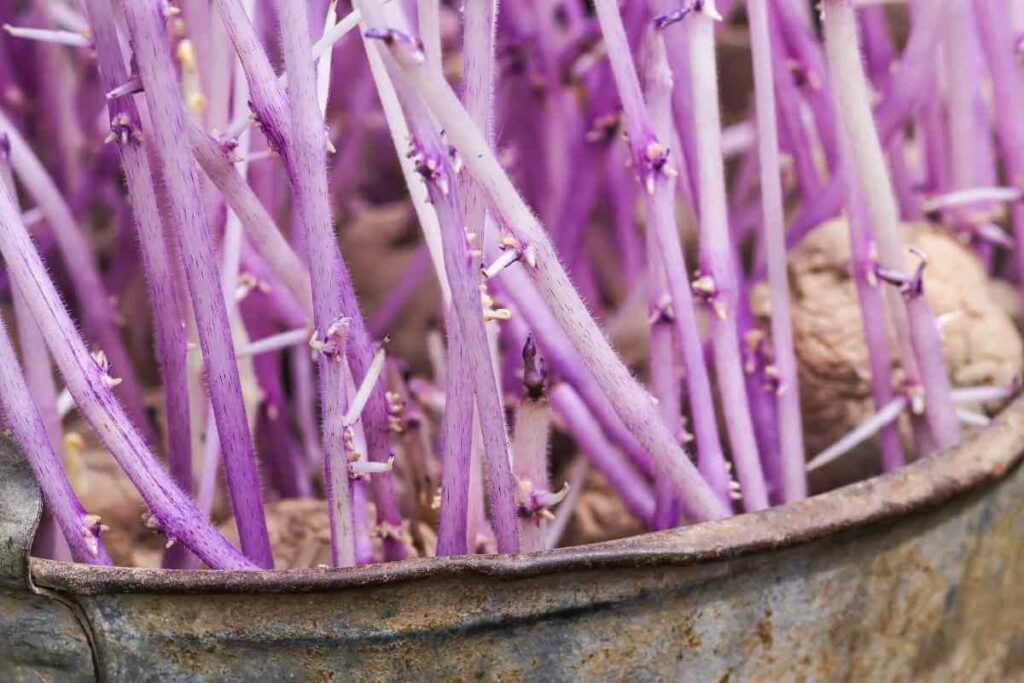
After purchasing the seed potatoes, the next process is ‘chitting.’ The objective of chitting is to encourage the development of sprouts.
To do this, put them in an egg tray and place them in a cool place that receives direct sunlight, such as a windowsill. In two weeks, they’ll have one-inch-long sprouts.
Good to Know: While chitting isn’t mandatory, you’ll have to wait longer for your harvest if you skip this process.
Planting the Potatoes
Planting potatoes in a bucket is different from growing other plants.
You start by:
- filling the container with soil
- placing the seeds
- and then adding more soil
This ensures that the crops have enough room to grow tubers.
Start by pouring about for inches of good quality soil or compost into each bucket.
Add two to three potatoes to the soil, with even spacing among them. Then, add two more inches of soil above the seed potatoes.
After planting:
- Water the bucket such that it comes out through the drainage holes.
- Ensure that you expose the bucket to the sun for at least eight hours and remember to place it on a plank of wood or stones.
The prevailing climate conditions should dictate the frequency at which you water your plants.
In the dry months, water at least twice daily. When watering, remove insects and other unwanted materials.
If you want to check the amount of water in the soil, use a moisture meter.
What to Do When Potatoes Sprout?
A few weeks after planting, your potatoes should start to sprout.
When you notice leaves emerging from the ground, avoid touching them.
Instead, let them break through the soil themselves, as this improves their strength.
This process usually takes several days.
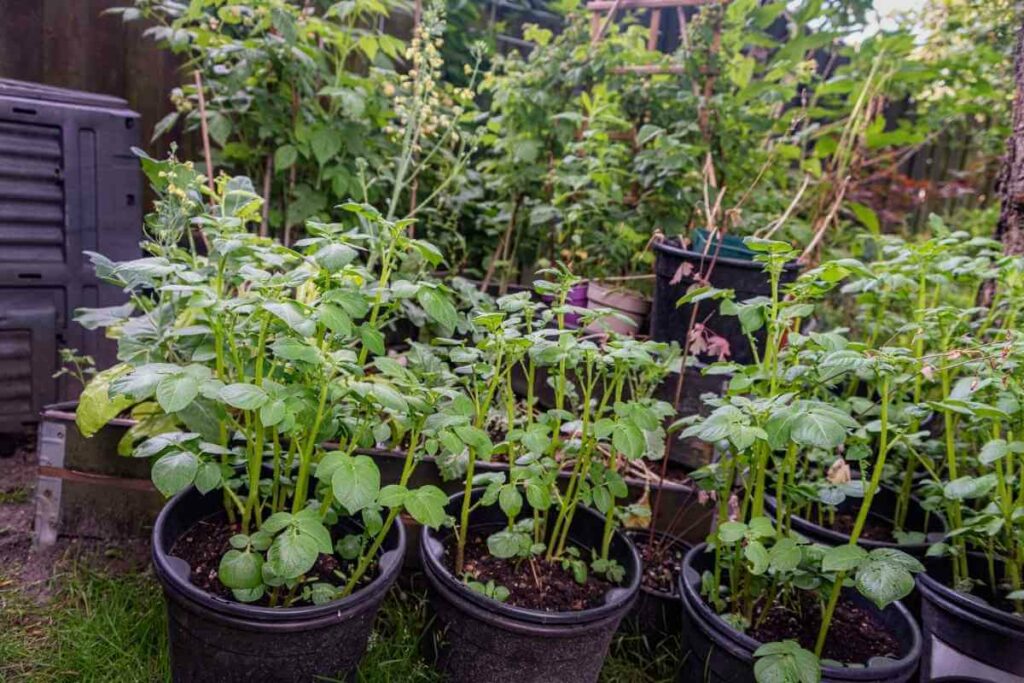
Hilling Your Potatoes
Sprouting usually starts two weeks after planting.
The right time to start hilling is when your plants are six to eight inches tall.
As the name suggests, hilling refers to adding more soil at the plant’s base once it emerges from the soil.
The significance of hilling is to cover the tubers that emerge from the growth medium from turning green and inedible.
Green potatoes are not safe for consumption because they contain chlorophyll and solanine, which can cause paralysis if ingested.
Besides soil, to hill your potatoes, you can use
- coconut coir
- hay
- mulch
- or potting mix
When hilling, be careful so that you don’t compact the plants.
This is also the right time to replenish nutrients by applying fertilizers. Gently mix it with the topsoil as you did during the planting phase.
Check your buckets regularly and hill any potatoes whose tubers might start emerging from the soil.
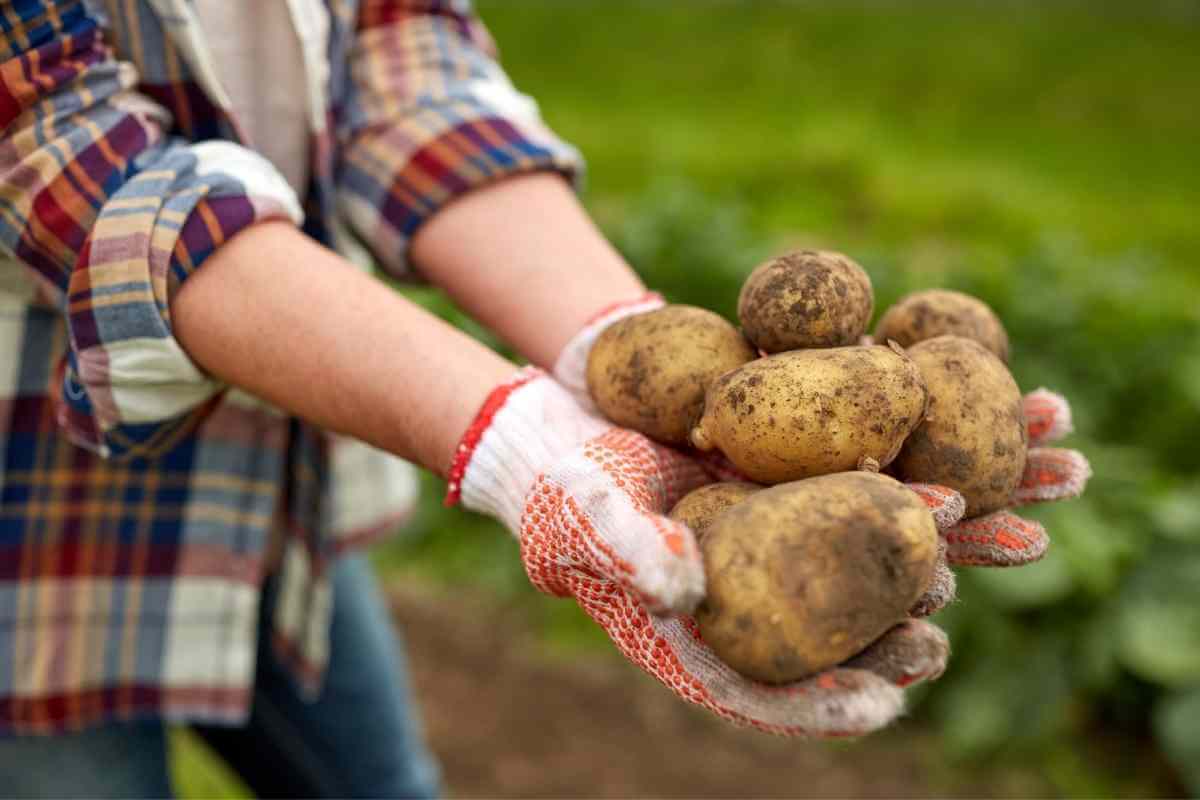
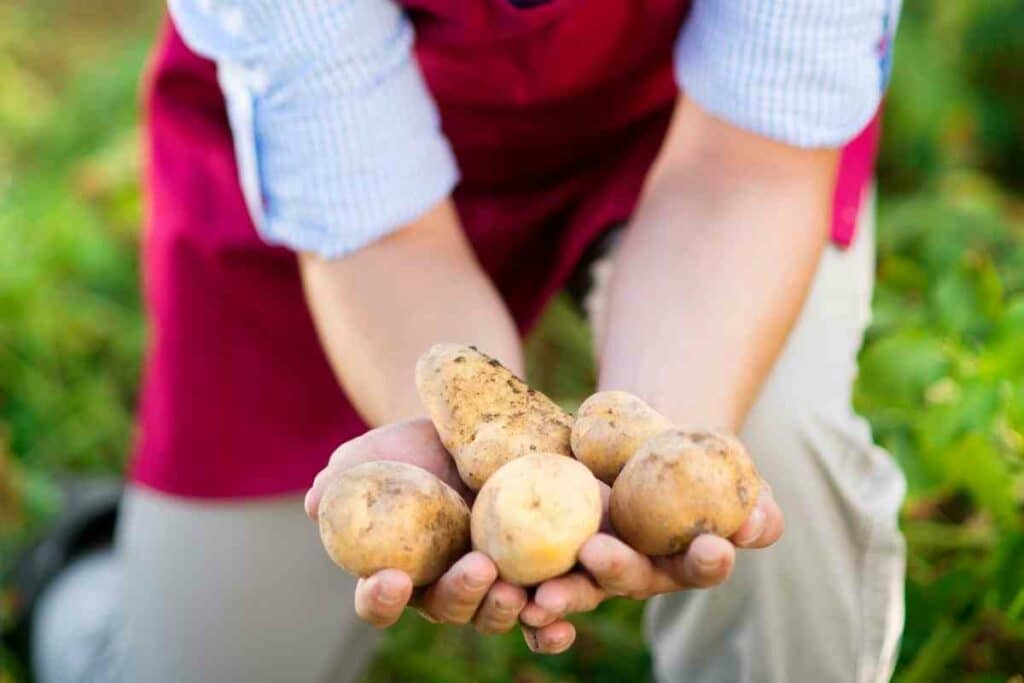
Harvesting Your Potatoes
The best time to start harvesting your crop is when the plants begin flowering.
However, if you want a meaningful yield, you’ll need more patience.
Assess the dirt around the base of the potato plants. If you feel something, all you have to do is pull the plant, and you’ll get the new potatoes.

It’s worth noting that new potatoes are highly perishable, so it’d be best if you cook them straightaway.
Continue keeping an eye on the plants as the season progresses. Once the plant dries up, the main crop will be ready for harvesting after a week or two.
As mentioned earlier, one of the most significant benefits of growing potatoes in a container is that you can get a harvest free of any damage.
This is because you don’t use a shovel to remove them from the growth medium, as is the case of plants grown on in-ground farms.
You can get your main crop by simply tipping over the containers.
It’s advisable to do this under dry conditions, as moisture increases the risk of rotting, which would be a disappointing ending to all your efforts.
Keep in Mind: After getting them from the containers, let them dry for at least two hours. Please don’t remove the dirt off them during this period.
Storing Your Harvested Potatoes
Poor storage practices can undo all the hard work you put in, from the preparation stage to the harvesting season.
Here is what you need to ensure that your potatoes remain edible for months after harvesting:
- Root cellar storages – these ensure that potatoes don’t freeze because they’re cool and dark. If you can’t get one, use a chilly corer in your basement or an unheated garage.
- Rebury the potatoes – dig six-inch deep trenches and place your potatoes. Then, cover them with loose soil and straw to prevent rainwater from seeping in. This method keeps them edible for two months.
- Freezer storage – here, you need to peel and slice the potatoes before putting them in a freezer bag using a vacuum sealer. Frozen potatoes can last for more than a year without going bad.
- Pressure cans – heating potatoes under pressure can remove the starch, enabling you to store them for several months.
- Make potato flakes – cook the potatoes until a knife can easily cut through them. Then place the mashed potato on dehydrator sheets and set the temperature at 140o to form flakes.
Wrapping Up
Potatoes are a favorite for many people worldwide because of their versatility.
You can boil them, fry them, and use them to make crisps, fries, and several other tasty meals.
It’s not a coincidence that many gardening hobbyists would like to try their hand at growing this crop.
Fortunately, you don’t have to own a large piece of land to practice potato farming – as seen above.
You can grow them in a bucket and get a damage-free and pesticide-free yield.