Growing microgreens is easy and fast.
However, the quality and quantity of your produce may be compromised if harvesting is done improperly.
It is thus essential to take note of how and when you should harvest.
Before cutting, you should first determine the right time to harvest, prepare the harvesting area, and gather harvesting tools. Cut microgreens should then be washed and dried then placed in containers or bags for storage. Lastly, microgreen residues should be disposed of in a compost pile.
Process of Harvesting
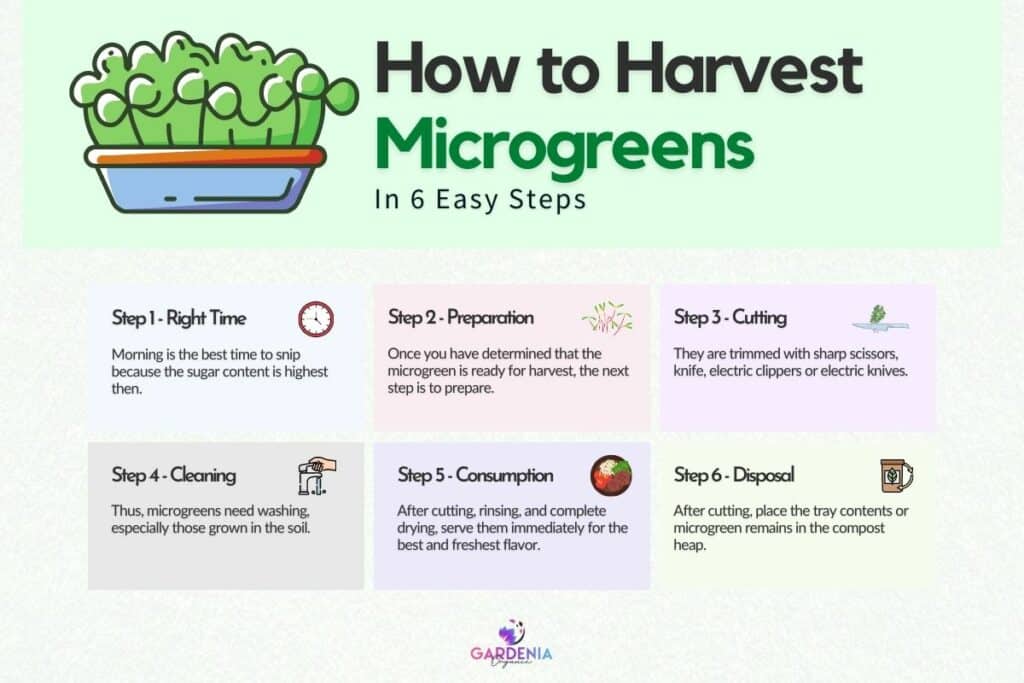
Step 1: Determine If The Microgreen Is Ready for Harvesting
Knowing when to harvest microgreens can mean the difference between a successful harvest and a bad one.
The harvest time affects everything from shelf life, flavor, freshness, nutrition to quantity.
It is also important to note that different microgreen varieties have different growth rates. Thus, the trickiest thing about harvesting microgreens is establishing when they’re ready.
Some of the vital considerations include:
- age
- color
- size
Generally, a ready microgreen should reach a length of between one to four inches. That includes everything the stems, leaves, and sometimes even the roots.
You don’t want to cut them when the microgreens are undersized, but they will lose their sweetness and turn hard if you wait too long.
The age of harvesting microgreens is totally up to the growers themselves – however, the average duration is 18-25 days.
Nonetheless, some might be ready within 10 days after planting, such as lettuces and Pak Choi.
When harvesting microgreens, you should cut when there are at least two sets of leaves or more but at the right length and age for your variety of microgreens.
Microgreens can be harvested at the seed leaf (the cotyledon) or first true leaf stage, depending on the grower’s preference.
First true leaves are like a smaller version of the plant’s adult foliage, are hairier and more decoratively shaped than seed leaves.
Cutting cotyledons is not much recommended as you may accidentally break its stem instead.
The time of day you cut your microgreen affects its taste and shelf life.
The ideal harvesting time is during the early morning or evening:
- Morning is the best time to snip because the sugar content is highest then.
- Overnight, microgreens replenish the moisture lost during the day and use the nighttime hours to make sugars from the starches they produce during the day.
- Microgreens harvested in the morning are generally fresher, sweeter, crunchier, juicier and sustain their freshness throughout the day and stay longer when refrigerated than those picked at other times.
Like other plants, microgreens don’t die the very second they’re cut from the mother plant. Their internal metabolism continues to react and convert reagents into products.
During the day, they possess heat that increases their metabolism, which affects their shelf life.
Excellent Advice: By harvesting during the cool early morning, the produce stays cool, and metabolism slows, which means a longer shelf life.
Step 2: Prepare for Harvesting
Once you have determined that the microgreen is ready for harvest, the next step is to prepare.
Preparation is essential to save the quality of the product and prolong its shelf life.
Before harvesting:
- Set up the cutting area.
- Assemble clean containers or plastic bags for storing your microgreens.
- Choose your harvesting tool,
- Get a clean paper towel or dishcloth to wipe off your harvesting tool as needed during cutting.
Tools play an essential role during harvesting.
Microgreens are tiny edible plants; therefore, it is recommended to use small harvesting tools to avoid damage to these fragile greens.
For large-scale farming, electric clippers or electric knives are best, whereas small-scale farming is best harvested using a pair of scissors or sharp knives.
The importance of using a clean, sharp harvesting tool is that it gives a healthy cut that prevents rot and bacteria from growing on your microgreens.
From Experience: The method of harvesting depends on the type of farming that is large or small-scale farming. However, hand-harvesting is the most preferred method for harvesting microgreens as it ensures quality and healthy cuts.
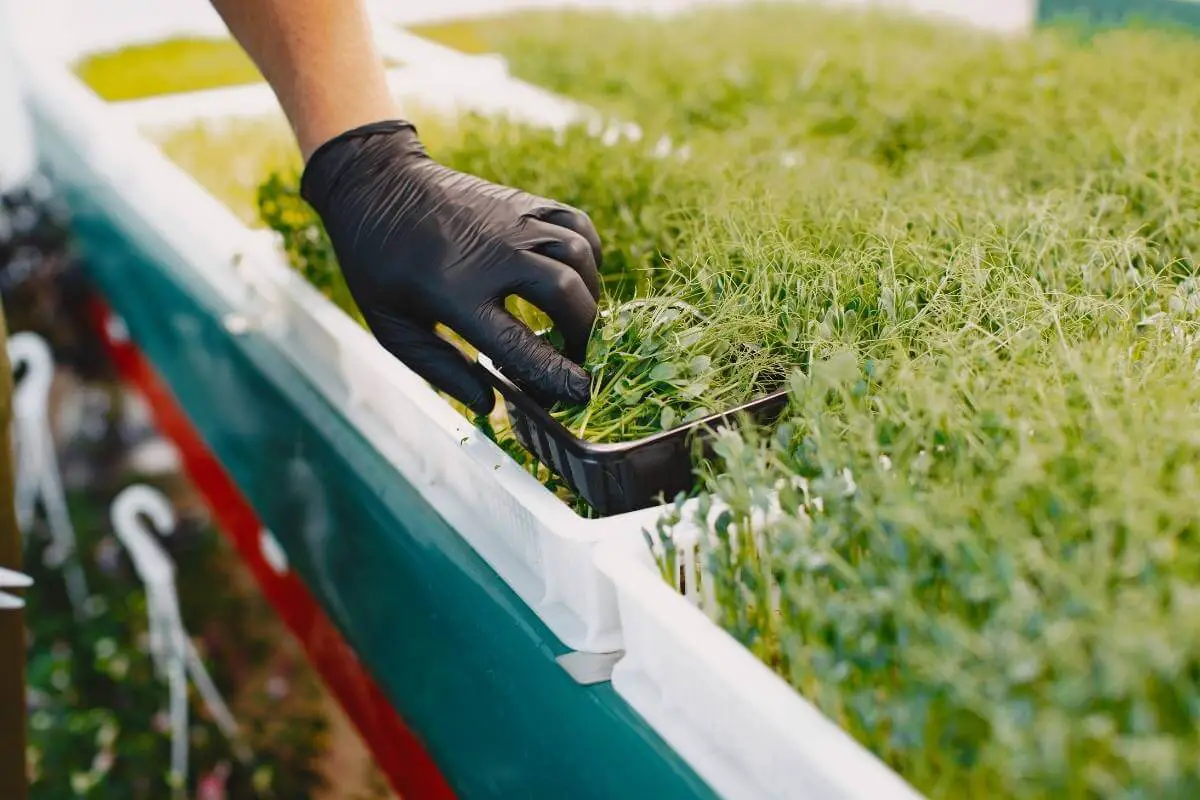
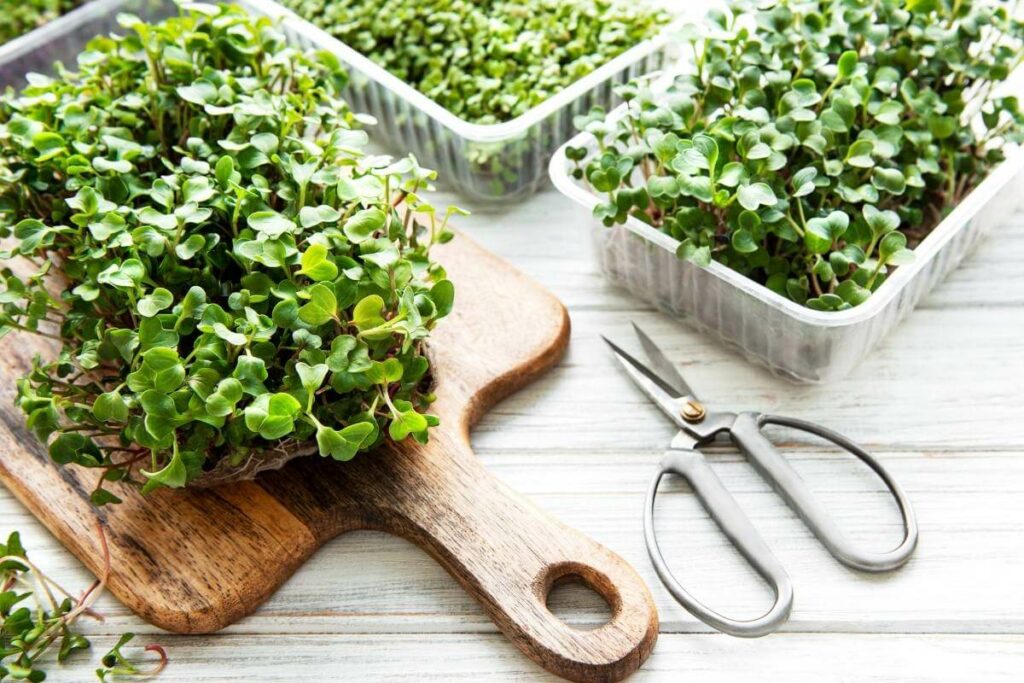
Step 3: Cutting
Microgreens can be enjoyed whole, but the most edible parts are the stem, seed leaves, and the first set of true leaves.
They are trimmed with:
- sharp scissors
- sharp knife
- electric clippers
- electric knives
They shouldn’t be pulled out of the soil with your fingers to avoid disturbing all of the roots or possibly entirely pulling them out of the soil.
Pull up the microgreens on top with one hand and use the other hand to snip them below.
This way, the microgreens will not be dropping off onto the soil and get dirty. Handle gently not to break the leaves as they are very fragile and subject to bruising.
Make sure to cut your microgreens about an inch above the soil. If you are not cutting above the cotyledons, then the microgreens will not grow any further.
Also, remove damaged leaves or other problem areas to avoid an undesirable taste.
Always start with clean hands or wear gloves and a clean working surface. Clean your harvesting tool after each use.
Cleaning will ensure healthy greens and prevent cross-contamination.
Step 4: Cleaning and Drying
A microgreen may have:
- mold spores
- bacteria
- seed hulls
Thus, microgreens need washing, especially those grown in the soil.
After trimming:
- Wash the ends to remove any leftover soil or dirt so it won’t ruin the taste of your food
- Or shake vigorously before rinsing to get rid of seed hulls. Hulls can be moved further by fluffing washed microgreens on a rack.
Coldwater is preferred when cleaning as it maintains the overall freshness. Coldwater also cools the microgreens down, slowing bacterial growth, thus extending the shelf life.
Once you’ve rinsed with water, ensure they dry properly before storing or packing as moisture reduces the shelf life by promoting mold growing.
First, drain well in a colander or strainer. Then dry them by patting them with paper towels or tossing them in the salad spinner.
For Complete Drying: Lay out the greens in front of a fan and let them dry for a few minutes, and turn them over every so often.
Step 5: Consumption and Storage
After cutting, rinsing, and complete drying, serve them immediately for the best and freshest flavor.
The flavors of microgreens can range from sweet to spicy. They also make an excellent garnish for salads, sandwiches, and soups, adding extra flavors and textures.
The remaining cut microgreens should be stored in clean containers or plastic bags and kept in the fridge.
They typically last in the refrigerator for up to a week.
Step 6: Disposal
After cutting, place the tray contents or microgreen remains in the compost heap.
They will make great material in your garden as they are rich in nitrogen and provide nutrients far superior to chemical fertilizers in the soil.
Final Thoughts
Harvesting is carried out when all the nutrients have developed and the edible parts have reached the appropriate degree of maturity.
With the above easy harvesting steps, growers are assured of getting produce that is rich in nutrients, sweet, juicy, flavorful, fresh, and with a long shelf life.
You May Also Read
- How to Grow Celeriac from Cuttings?
- How to Grow Alfalfa Microgreens?
- Can You Grow Herbs Indoors Without Sunlight?