
Soil & Nutrients
The growing medium (“soil”) in a container serves two functions: First, it provides a medium for the growth of plant roots, and second, it retains moisture and nutrients for plant growth.
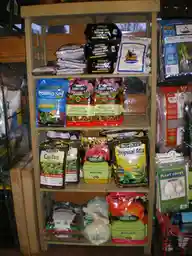
When it comes to soil for growing plants in containers, not all commercial blends are the same. They can vary in how well they retain moisture – or how well they drain – as well as whether or not they contain important plant nutrients. Some – not all – blends have fertilizer already mixed in.
It’s important to read the product label so know what you’re buying. The potting mix you use will affect your plant maintenance routine.
Table of Contents
Selecting the Right Potting Mix
There are plenty of different soil blends available at your local garden centre but not all of them are suitable for growing plants in containers indoors. Potting mixes for general indoor gardening use will be labelled “potting mix” “container mix” or “soilless mix” They will be varying blends of peat moss or coconut coir, perlite (the little white bits), vermiculite (the little shiny bits), and sometimes compost, sand or small pieces of bark. In addition, some may be labelled specifically for “indoor use” These are usually blends that have been sterilized to avoid the risk of introducing plant diseases to the indoor garden.
Most potting mixes will be fine for the majority of indoor plants. There are also specialty blends to suit the specific needs of different types of plants; cacti & succulents, orchids, or African violets. These have been blended – sometimes with additional ingredients – either to increase drainage or to improve moisture/nutrient retention.
Whatever potting mix you choose, be sure not to use a soil product labelled as “top soil” or “lawn blend” These are for outdoor garden beds and are too dense to use in containers.
For more information on potting mixes, go to “Indoor Garden Care & Maintenance”
Fertilizing
Fertilizing plants in an indoor garden (i.e. in containers) needs a little more planning and attention to detail than plants in outdoor garden beds.
Fertilizers are a form of salts and some types, if misused, can accumulate to toxic levels in the soil of a container and cause permanent injury to your plants. So you’ll need to pay attention to what type of fertilizer you use, how it’s supposed to be used and keep track of how often you apply it to your plants.
There are several formulations of fertilizers, each with varying levels of nutrients to suit different types of plants. Some fertilizers are formulated to support the growth of foliage, while others provide more nutrients to support flowering. In some cases, commercial potting mixes will have fertilizer already blended in.
Regardless of the varying nutrient levels in fertilizers, they can be broken down into categories based on how they’re used:
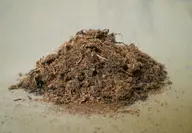
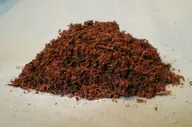
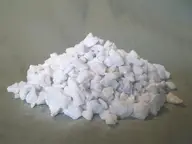
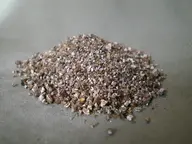
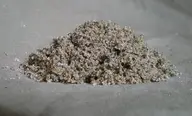
- Slow-release: These fertilizers are applied infrequently throughout the life of a plant because they gradually release nutrients to a plant over a long period of time. They’re generally applied once every 6-8 weeks during the growing season. Most organic fertilizers are slow release because they need time to break down and release nutrients to the plants.
Slow-release fertilizers are usually blended into the potting mix before a plant is planted. They can also be blended into the top few inches of soil. - Water-in: As the name suggests, these fertilizers are mixed with water and then applied to the soil when watering a plant. Nutrients are immediately available to the plants and taken up with the water. Water-in fertilizers come in liquid or crystal form. They are generally used once every two to four weeks, but frequency will depend on the exact fertilizer formulation and the type of plant.
- Controlled release fertilizer beads: These fertilizers, in the form of small beads, are sprinkled across the soil surface or mixed into the potting soil. The release of nutrients to the plants is controlled by moisture in the soil. Every time a plant is watered, nutrients are immediately available to the plant (like water-in fertilizers) and one application of beads can last for several weeks. They’re sort of a hybrid between slow-release and water-in. These products are sometimes inaccurately labelled “slow-release”
Each fertilizer formulation is used differently. Slow-release or controlled-release fertilizer beads are added once every six to eight weeks. Water-in types are used on a more frequent basis, depending on the fertilizer formulation and plant type.
What fertilizer you choose to use will depend on what plants you’re growing, and what type of gardener you are. Do you like the idea of applying fertilizer once and not having to worry about it, or are you okay with mixing water-in fertilizer regularly to feed your plants? When it comes to using fertilizers, there can be too much of a good thing. So whatever fertilizer you decide on, be sure to read and follow the directions on the label.
For more information on types of fertilizers and how to choose the right one for you plants, go to “Indoor Garden Care & Maintenance”
Soil Amendments
Most outdoor gardeners are familiar with the idea of adding organic mulch to garden beds to refresh and maintain the organic matter in the soil. Plants grown in containers also need their soil refreshed every year or so, depending on the type of plant.
Potting mixes are made up mostly of organic matter (peat moss, coconut coir, compost) that breaks down over time. After a few years, the fluffy potting mix takes on a dry dusty consistency that doesn’t hold moisture – or nutrients – very well. Plant health will eventually begin to suffer as a result.
Plants in smaller containers are generally re-potted every couple of years with fresh potting mix. For plants in larger containers, re-potting can be a challenging process, so instead, the existing soil can be amended.
To amend the soil in a large container, the top third to half of the soil can be removed and replaced with fresh potting mix. How often this needs to be done will depend on the type and size of the plant, but generally every two-three years should be often enough.
The soil in containers can also be maintained by replacing the top inch or two of soil with fresh potting mix every year.
The potting mix can also be amended by adding an inch of compost to the soil surface each year. Compost products can be purchased or if you’re adventurous you can make your own compost at home indoors. Commercial composts are usually sterilized, meaning they won’t be carrying plant pests or disease, whereas homemade composts may present more risk to plant health.
Container, raised-bed and potting-mix planner
Container dimensions and recipe fractions → fill volumes, component bags and costs.
Open full calculator · Calculation schema v2 · Sources checked 2026-10-28
Formula and worked example
Box: V = length × width × fill depth. Cylinder: V = πr²h. Tapered pot: V = πh(R² + Rr + r²) ÷ 3. A right-triangle bed uses half the box volume.
Example: a 30 cm diameter cylindrical pot filled to 25 cm holds 17.67 liters before rootball displacement or settling allowance. Subtract displacement per container, multiply by the count, then multiply by (1 + allowance ÷ 100). Component volume = total × fraction ÷ 100; round each shopping quantity up separately.
Read Kathy’s soil and nutrients guide, olive tree potting guidance and pumice and lava rock guidance, or open the standalone substrate planner.
About the Author