Welcome to our complete guide on growing, feeding, and caring for your tropical Polka Dot plant.
This guide will culminate in and present collective research, from a number of reputably published sources, providing you with best and most up-to-date knowledge, guidance, and tips, on how to care for your speckled pride and joy, so that it can both flourish and thrive.
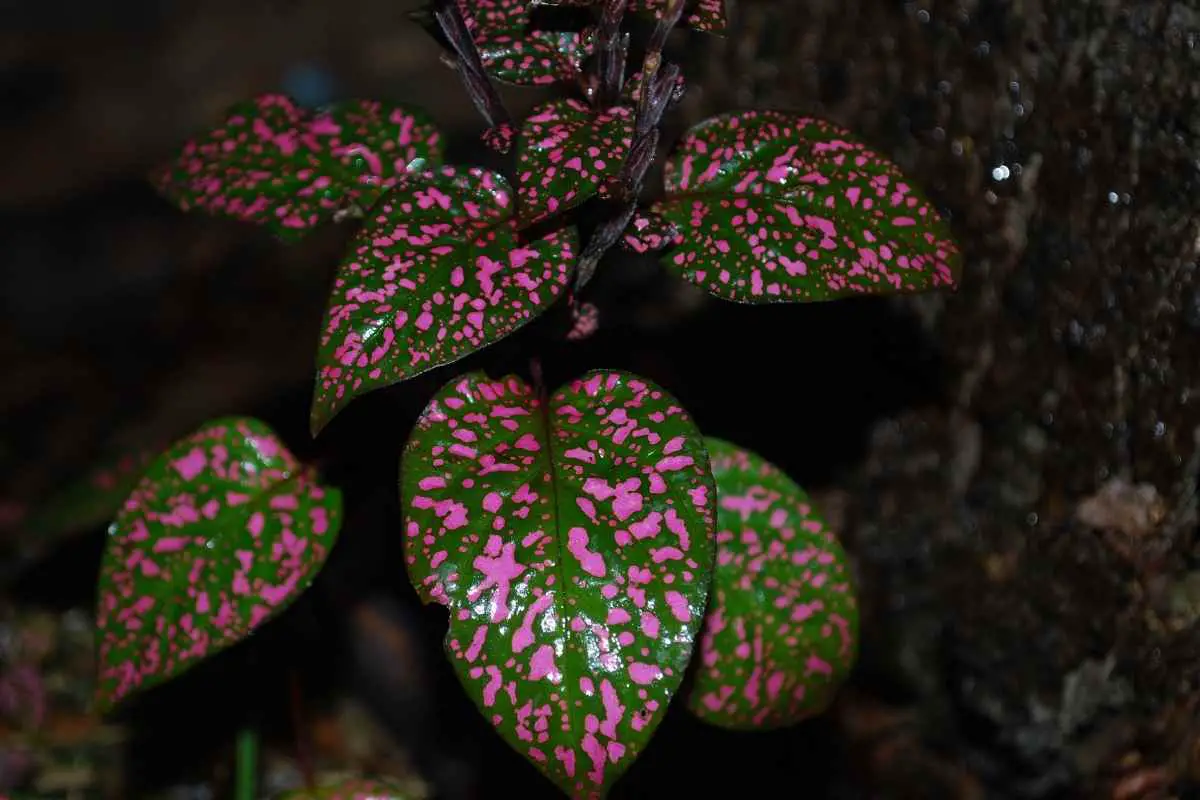
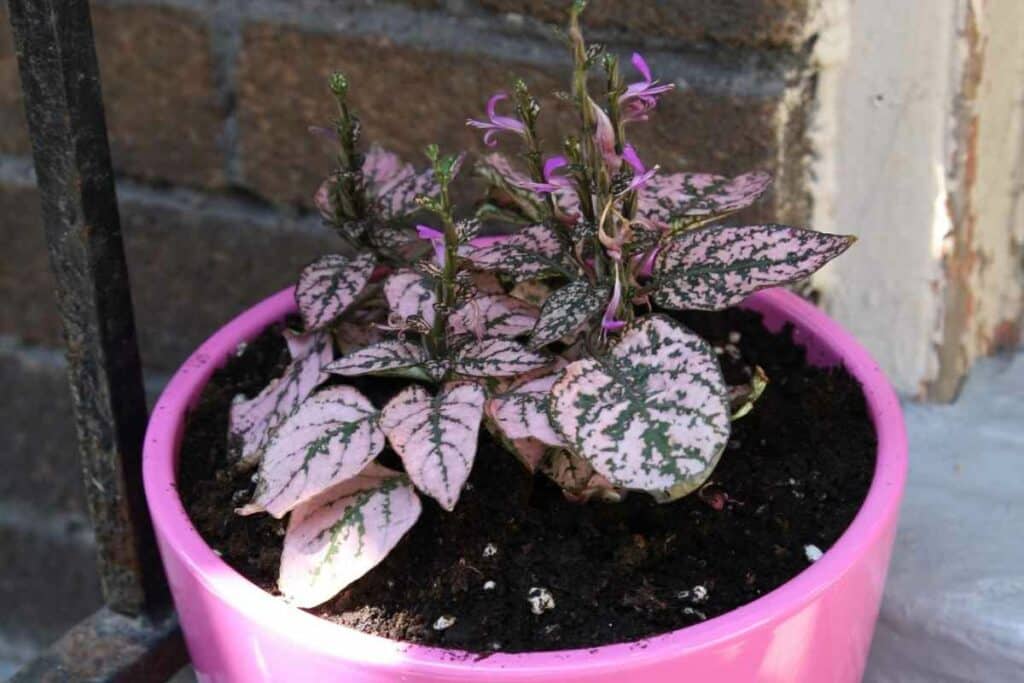
The Polka Dot plant
Latinate Title: Hypoestes phyllostachya
Family: Acanthaceae
Toxicity: Non-toxic and pet safe
It will also present information about both soil and water propagation; as well as the most common signs to look out for, which indicate that your plant is in distress and tips for rescuing an ill or seemingly dying Polka Dot plant.
Lifespan: 12-24 Months (approx.)
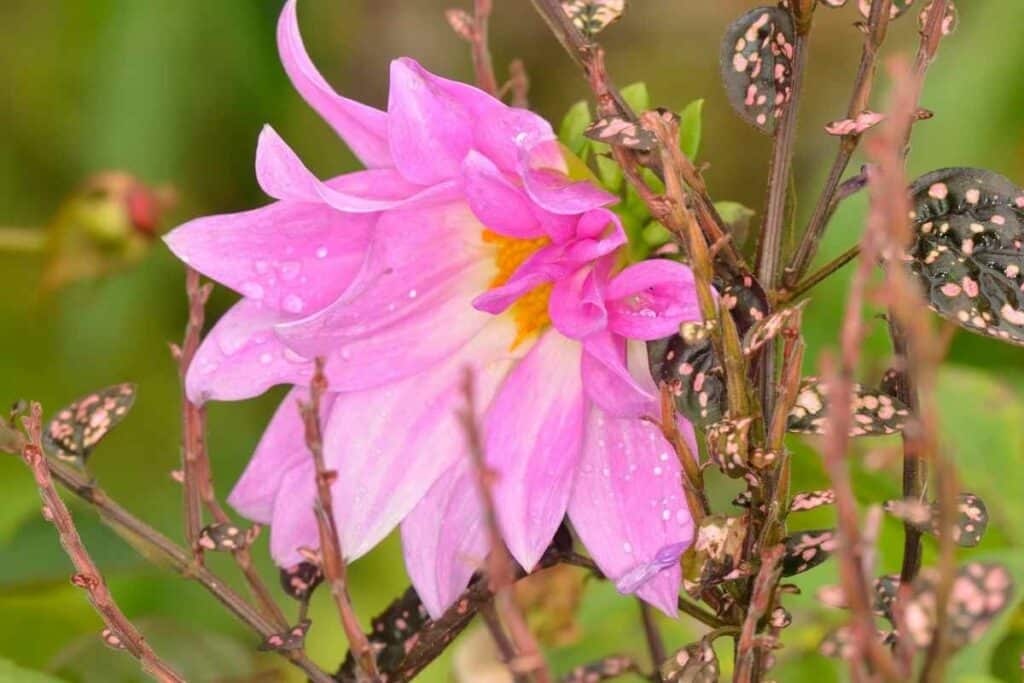
Tragic, though it may seem, the Polka Dot plant or as it is otherwise known: the ‘Triple Splash’, ‘Flamingo plant’ or ‘Freckle Face’, meets its inevitable end or dormancy shortly after it blooms.
This famously beautiful flowering plant can, however, be nurtured indoors, often resulting in an extension and even a prolonging of its short lifespan – from just over a year to anything up to around two years.
According to Tovah Martin (Indoor Gardens, 1997), they will live, most suitably, in a terrarium and will ‘thrive under artificial light’‘.
A terrarium being the perfect means of creating a humid atmosphere and appropriately moist environment.
In Ideal Conditions: They can grow up to 30 inches, both horizontally and vertically.
Variations & Compatibility
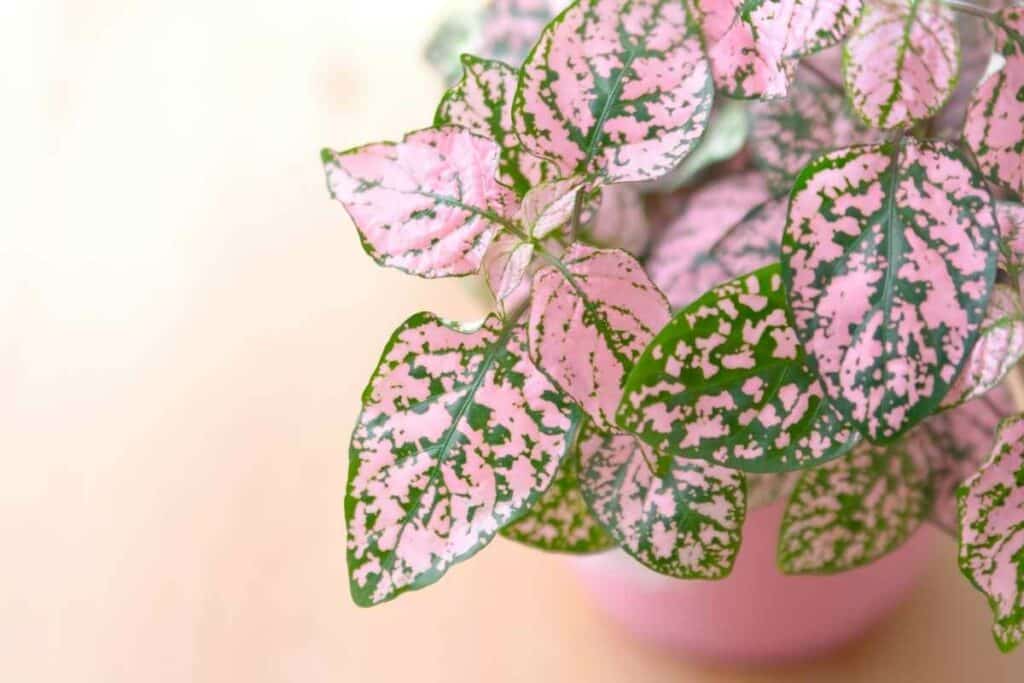
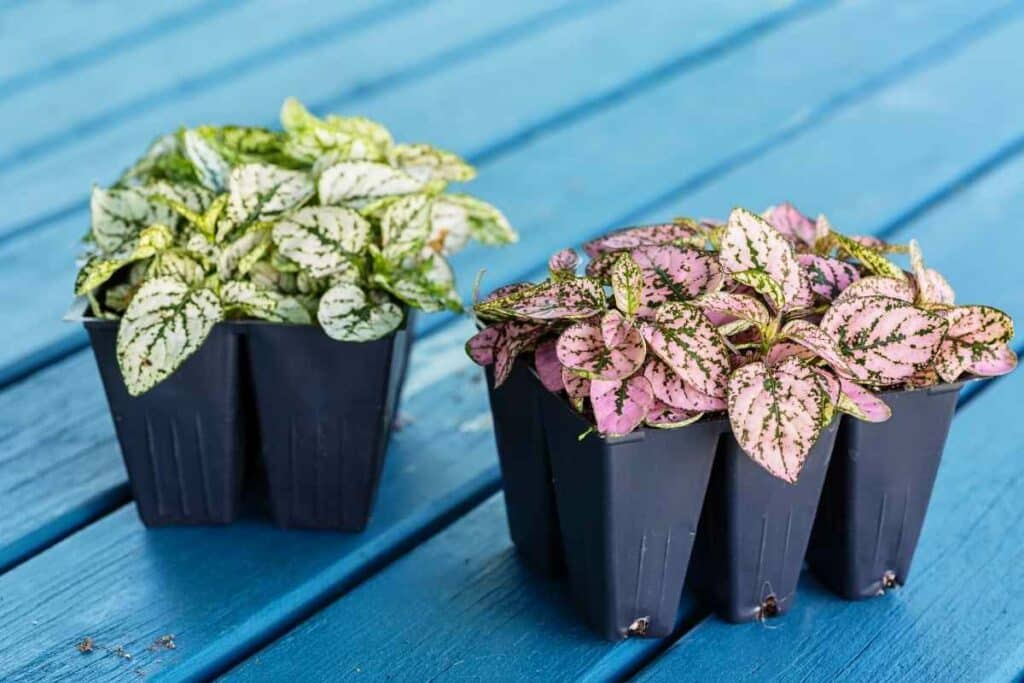
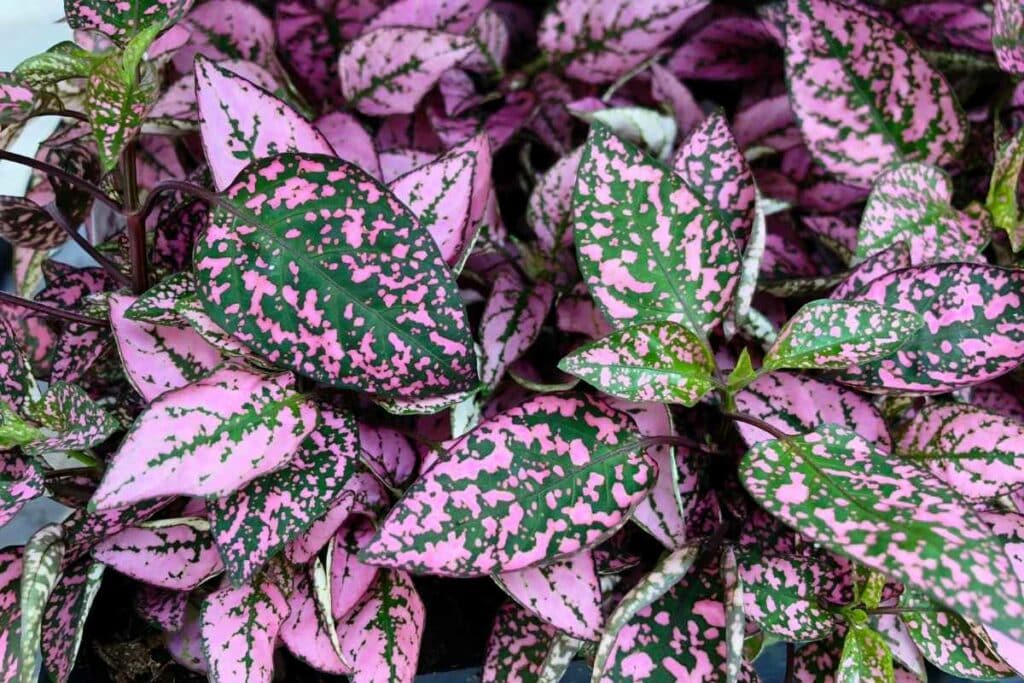
A few distinct variations exist: a pink speckled plant, a pink spotted plant, some with purple leaves and others with ‘bright red splotches’; as well as a white speckled plant with lighter, more green leafage.
Just before death or dormancy, these plants can surprisingly bloom, producing purple or pink flowers – making them an incredibly decorative plant, along with their famously dark, speckled leaves.
There are also some genetically spliced variations, these days, which reverse the pink and green.
These plants fit best with other plants that prefer warmer climates, such as: ‘impatiens’ ‘or caladiums’, but many plants will tolerate similar conditions.
Sowing Seeds
You should plant Polka dot seeds eight to ten ‘weeks before the average last date of frost for plants intended for the garden’.
Indoors, you can plant these all year round.
Seeds germinate in ‘4 days when held at 68’ degrees Fahrenheit or 20 degrees Celsius.
It is recommended that you only sow 3 seeds per 3-inch plant pot but 5, should you use a 4-inch one.
The seedlings’ ‘cotyledon’ (the first leaves to appear) will be a pale green, however, the initial few actual leaves will present color.
Propagation
Propagation is achievable in either soil or water, the latter being considered a perfect, temporary habitat to aid the propagation process before placing the cuttings more permanently in soil, either in or outdoors.
Soil Propagation
Placing the seeds or fresh cuttings into compost-rich, fertilized soil is the preferred growing method.
Whether it be in a garden bed or plant pot, they should be situated in a spot with at least intermittent but indirect sunlight exposure and they will flourish in warmer climates.
So, the more sunlight the better!
However, the more sunlight that they get, then the more water that they will need and the less time that they will require to grow.
They should be:
- placed with a 12-inch perimeter of space from other plants
- or each should be placed within an individual plant pot of at least 6 inches, to provide the roots with ample space to grow and feed.
Nellie Neal (Gardener’s Guide to Tropical Plants, 2012) recommends around 1-2 inches of mulch, or other organic materials such as barks or compost, should be placed atop the soil.
This locks in the moisture and provides a little bit of extra humidity, around the roots, which aids to replicate the plant’s original tropical habitat, more closely.
It is also recommended that you mix moss and/or compost in with the soil, prior to planting (Marcia Tatroe, Cutting Edge Gardening in the Intermountain West, 2007).
Additionally worth noting, is the fact that whilst this plant does need moisture, it cannot survive flooding.
Water Propagation
Being a tropical plant, natively located in Southeast Asia, South Africa, and Madagascar, the Polka Dot will also do very well in water with an artificial lighting setup, generally.
Subaquatic propagation, while taking a lengthy period with most plants, is actually more advanced with the freckle-faced Polka Dot.
Using a standard method, remove the lower leaves and submerge the new stems in water; ensuring that their leaves stay above the surface.
Place them in mild to moderate sunlight and roots will shortly emerge, creating a whole new plant in just 2-3 days!
Should you experience a run of duller days then it may take longer (Betsy Kreidler, Growing with Care, 2002). This being the case, you will need to change the water every few days.
Works Best: When roots are formed over an inch, it is best to then transplant into fertilized soil or another potting medium.
Feeding & General Care
Although they love humidity and sunlight, you should always ensure that the sunlight is not direct.
This can cause the leaves to dry out, turn brown and often dry out enough to go crispy.
Both over and underfeeding, as well as over or underwatering, can also each have drastic effects on the plant and its appearance which will quickly deteriorate. Leaves will droop and its color will lose some of its renowned vibrancy.
In the first couple of weeks, they will need watering twice per day, until you start to see growth (Bost & Polomski, Carolinas Gardener’s Handbook, 2012).
Water the plant lightly (allowing it to near dry out completely between each irrigation)[1] and regularly, during the first year of growth.
Once the plant is active and forming young leaves, it will require feeding ‘every 2-3 weeks’ with food reduced to half the strength, as well (Deborah L. Martin, Your Houseplant’s First Year, 2021).
Mahr also recommends periodically misting the plants, ‘indoors during the winter’ months.
[1] It is even recommended that you check by placing an inch of your finger into the soil, to check that it is only just damp – before you water again.
Troubleshooting
In most situations, any ill-looking or dying Polka Dot plant can in fact be rescued. Or there is at least a chance to save them.
Should your plant lose color, seeming dull; become leggy and appear uneven, or start to go crispy at the leaves, then there is always a solution to try.
A Leggy Polka Dot Plant
When Polka Dot plants don’t get enough light, the stems will be forced to grow in order for the leaves to reach towards any light that they can find.
The stems will then be positioned to shade lower leaves, and the bushiness of the plant can become very uneven and tatty.
Tackle this by:
- providing extra light and situating the plant closer to a window (if inside)
- or in a less shaded area (when outside)
These pretty plants are somewhat hardy and have adapted to a small amount of shade; however, if they don’t get enough indirect sunlight or artificial lighting, then they will suffer, and you will start to notice very quickly.
Cut down the leggy stems and this will also encourage business.
You can also ‘pinch young plants’ to do this, too (Neal, 2012).
Pinching involves zero equipment and is just the use of your index finger and thumb ‘to gently remove the tip of a plant’s new growth/s.
This encourages a ‘denser growth’, overall (Judy Lowe, Tennessee & Kentucky Month-by-Month Gardening, 1998).
Pruning Leggy Branches
According to Lowe (1998), when it comes to pruning correctly – even holding the pruners can be done ‘a right and a wrong way’.
She recommends placing ‘the thin blade’ right up against ‘the trunk’. Cut diagonally, slightly, so as to slice at an angle.
Quick Tip: The angle should be ‘cut about ¼ inch above a bud pointing in the direction’ you want them to grow. This will ensure that there is a strong connection to the trunk and a good, healthy growth.
A Polka Dot with Crispy Leaves
Should you find that your Polka Dot plant’s leaves become dry and crispy, this often either indicates a lack of water or too much sunlight.
Sunlight needs to be indirect, so be sure that sunlight never directly hits the leaves. A lack of humidity can also have this effect.
Many sources recommend a home humidifier, as an effective method of raising and maintaining the levels of moisture in the plant’s environment.
These come in all shapes, sizes and at high and low prices but simply placing a bowl of water in the room, in a warm spot or by a radiator in the Autumn and Winter months, can be sufficient enough to humidify the air.
Via a process of elimination, you should begin to see your plant’s moisture and color return.
A Wilting Polka Dot Plant
Wilting is a very common issue among most plants.
As with most symptoms of distress, wilting can be caused by a number of different affecting factors. However, the most common cause of this with a Polka Dot plant is a lack of hydration.
These plants tend to need less water than many others, but they still need to be maintained quite closely. Letting them dry out too much can result in dry leaves and wilting branches/stems.
According to Melanie Florence, providing extra water will produce rapid results and she uses the plant as her ‘water gauge’.
As soon as it ‘starts to sag’ she waters it. Simple as that (Florence, Glass Gardens, 2017).
Other Things to Watch For
These hardy, heat-loving plants are unfortunately susceptible to a number of problems, as with many plants.
When outdoors, watch for slugs and snails which, as Toby Bost states, ‘like shady environs too’. These can be devastating to most plants.
Other than that, the consensus is that this plant is rarely bothered by pests, at all. [1]
Despite this, there is mention in the form of a warning about both ‘whiteflies’ ‘and powdery mildew’ (Deardorff & Wadsworth, What’s Wrong with My Houseplant? 2016).
[1] This is corroborated from the John Henry Company (1975) to Toby Bost (2015). Although, some websites contest this information without reference to any sources.
Fungal Infections
If you find that your polka dot plant develops a white powdery coat on its surface, then your plant is infected with a ‘fungus disease’ which, unfortunately, means that there is little to be done for the plant itself.
These can be seed-borne, soil-borne and will ultimately rot the roots.
You will need to ‘sanitize’ by removing and destroying ‘infected plants’, to stop this from spreading throughout your garden.
This includes infected roots and other subterranean parts, as well as surrounding soil (Deardorff & Wadsworth, What’s Wrong With My Plant? (And How Do I Fix It?), 2009).
Whiteflies & Aphids
Whiteflies and Aphids are carriers of viruses which infect plants and cause disease (William Thompson, The Whitefly, Bemisia Tabaci, 2011).
Although these pests can be both, directly and indirectly, damaging, in small numbers they are relatively harmless.
However, should ‘population density’ increase to high levels, then ‘damage and virus transmission’ can occur (van Emden & Harrington, Aphids as Crop Pests, 2017).
So, what can you do?
There are some simple steps to take, in order to ensure that your plants stay healthy.
- Mary Flint suggests that ‘in gardens or small areas, spun-bonded polyester or other types of insect-proof covers’ can be used, particularly when plants are young (Flint, Pests of the Garden and Small Farm, 2018).
- If you find that you have an infestation: spray the plants with water using a spray bottle or even a syringe for more stubborn pests. Prune any heavily affected parts of the plant and dispose of them.
- You can also use the good old sticky insect traps around the house and/or garden. Or, more humanely, you could attract what are referred to as ‘beneficials’, which are other insects that deter these pests, such as bees and wasps.
Having an abundance of flowering plants can help to attract these and others.
Always Good Idea: It is also a recommendation to use fertilizers low in nitrogen.
Also Helpful
- Philodendron Care, Varieties, And Aesthetic Home Arrangements

- Best House Plants for Low Light – Thriving Indoors with Minimal Sunlight
- 15 Air-Purifying Houseplants That Release The Most Oxygen
- Purple Houseplants: Your Guide to Dramatic Indoor Beauty
- Philodendron Moonlight Vs. Golden Goddess
- How to Revive Your Rubber Plant: 6 Tips to Help Your Rubber Tree Thrive Again