Aquaponics is a form of integrated agriculture that combines fish farming with plant growth.
The water from the fish tanks provides nutrients for the plants, and in return, excess plant matter becomes fertilizer for the fish tank.
The self-sustaining cycle produces an abundance of healthy vegetables and protein without using any harmful chemicals or pesticides.
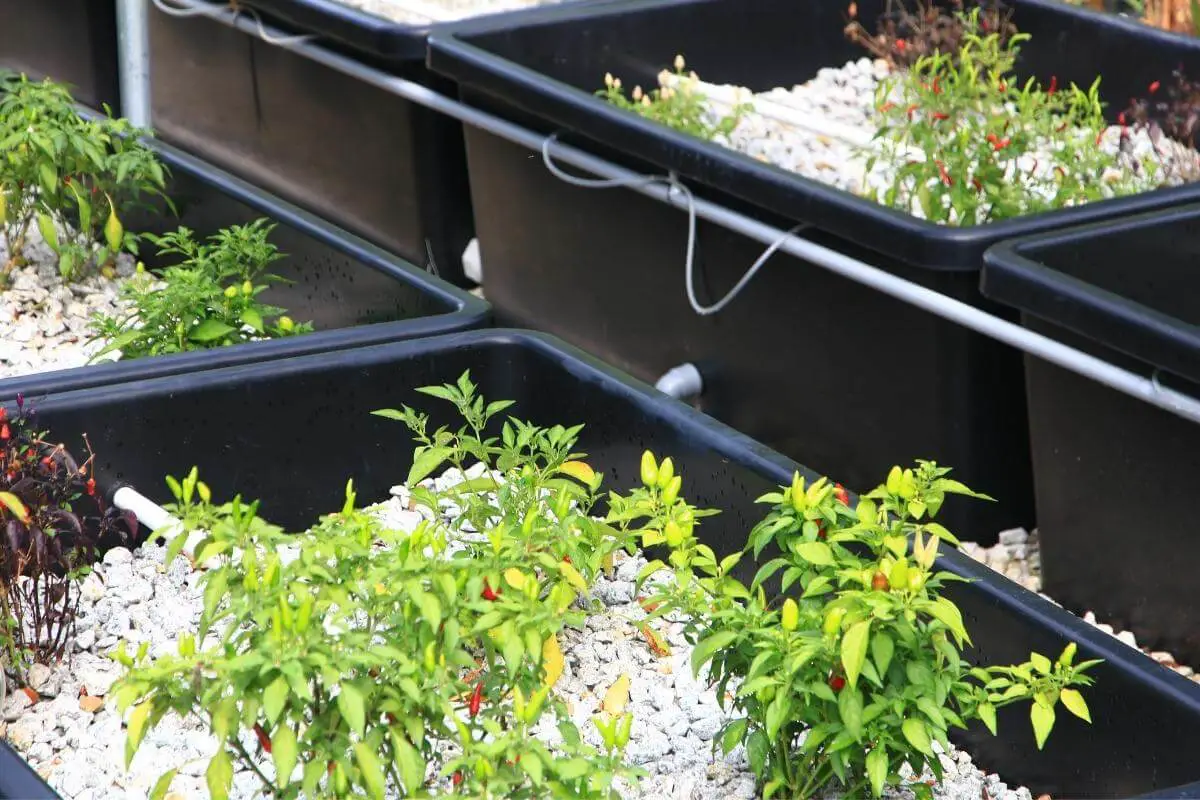
A wicking bed aquaponics system (also called flood and drain) uses gravity to pump water into beds that get elevated above ground level.
If you want to set up your own wicking bed aquaponics, this guide will help you build your system from scratch.
You’ll find everything from what materials you’ll need to tips on how best to set up your new system so it runs smoothly and successfully.
We’ve also included helpful links for additional resources if you want more reading material. Let’s get you started.
What You Need
To set up your wicking bed system, you must first get ready with all the necessary materials.
You can find most of the materials around the house or purchase them.
Here’s a quick shopping list if you do not already have any of these items:
- 1 sheet 1/2 inch by 4 X 8 plywood
- 48 – 54 inches of 2X4s
- 3 feet of 5/8” PVC pipe
- 2 – 3 feet of 1/4 inch rope
- 200 ft of small diameter pond liner
- 8 x 1 gallon-sized plant containers
- 140 cups of potting soil
- 2 x 40-watt aquarium heaters
- 2 x 3” net cups
- Fish food
- 1.5 lbs of fish
- Size: 4’x8’ plus 2X4s
Preparing the Materials
Now that you have all of your materials, it’s time to start getting ready for construction:
- First, cut the plywood sheet in half, so you’re left with two, two-by-four sections of plywood.
- Next, assemble three boxes out of your 2X4s by screwing them together.
- Ensure your plywood sheets will fit inside each box you’ve created. You should have three boxes: one for the bottom, and one on top of the other for both sides of your bed.
- Attach your PVC pipe to the center holes at each end of your net cups using a hot glue gun or silicone caulk.
- Seal it well to ensure the plant’s roots don’t escape through the holes and that no dirt falls out.
- Now, attach your net cups to your plywood top using small screws or nails.
Setting up the Wicking Bed System
The next step is to place your entire wicking system where you intend to station it. This could be on top of a table, desk, etc.
It’s best to have a water reservoir underneath your wicking bed to catch all of the nutrient-rich water that drains from your plants’ roots.
Might Consider: You can buy a 20-gallon Rubbermaid tub for this purpose.
Building the Reservoir
Next, build a small reservoir for catching all of the excess water from your wicking bed.
There are so many different materials you can use for a reservoir.
Alternatively, use a plastic storage tub to hold water for an aquarium.
Cut a hole into the bottom of the bin. Then, attach it to the underside of your table.
This will enable the excess water to drain out through the opening.
If your container doesn’t have a hole in it, or you don’t have access to one, you can always drill one yourself.
Finishing Up
Now that you have set up your wicking bed box and attached it to your water reservoir, the final step is to fill it with soil.
Remember, it shouldn’t be so water-retentive that the plants’ roots drown in it.
Next, find your heaters and fill them with water, plug them in, and set them on the bottom of your water reservoir.
It’s best to have these heaters on a thermostat, but they are not expensive, so you can always buy another one and set it yourself.
Finally, cut some small holes at the top of your wicking bed box for each net cup to fit through and support them from underneath. Fill each cup with soil, fertilizer, and seed.
Then plug in your heaters, fill your water reservoir and watch your system come to life!
For The Persistent: The entire project should take you no more than a few hours to complete. Excluding drying time for silicone caulk or glue. Once you get started, you’ll be surprised how simple it is to build your aquaponics system!
FAQs
1. How deep do I need to fill my wicking bed with water?
As a general rule of thumb, you’ll have at least two inches of water over the topsoil in your wicking bed.
That will ensure all roots are submerged and absorb as many nutrients as possible from the system.
2. What kind of fertilizer do I need to use on my plants?
If you’re using organic seeds or starter plants, your best choice of fertilizer should be organic.
However, if you’re growing with hydroponics, Plantex will work great (don’t forget to add more of this once your plants start growing)
3. What temperature do I need to keep the water at in my wicking bed?
Ideally, you’ll want to keep your water temperature between 75° and 80° Fahrenheit.
It will maximize the growth potential of all of your plants and is especially important for heat-loving plants such as tomatoes and peppers.
4. How many watts should I use to power my water heater?
The standard is 1 watt per one gallon of water.
However, the number can vary depending on the type of heater you have.
For example, a 50-watt flat aquarium heater will only need to be powered by about 25 watts, but a small 500-watt water heater will require close to 100 watts.
5. How do I keep my reservoir at the right temperature?
It’s easy if you have an aquarium thermometer.
The best way is to place it between your heater and reservoir to get accurate water temperature readings.
If you don’t have a thermometer and your room is between 70° and 80°, then you should be okay.
6. Where can I buy a wicking bed box?
Most hydroponics stores have them, and you can also buy them online.
Conclusion
That’s it! Building and running your wicking bed aquaponics is easy once you get the hang of it.
If you’re looking for a way to grow your plants without chemicals or pesticides, consider building an efficient, self-sustaining wicking bed that will provide you with all of the food you need.