Every microgreen home grower wishes to produce better yields.
However, it depends heavily on the planting space, climate, season, and care.
Thus, small indoor growing spaces and improper growing conditions within the house could hinder your production.
That said, a DIY microgreen setup is a perfect solution as it:
- Creates more space by making use of the vertical space in a home
- Is built to last season after season
- Is adaptable to all climates
This means you can easily maximize your microgreen yield even with limited space and less maintenance.
Starting microgreens in a DIY rack system begins by installing it and fitting it with lights, fans, and a timer. Seeds are then planted on trays, then placed on the racks, and covered to germinate. Watering, lighting, and airflow are then regulated to allow growth to maturity.
Install the DIY Shelf Setup
Starting microgreens in a grow rack begins with installation:
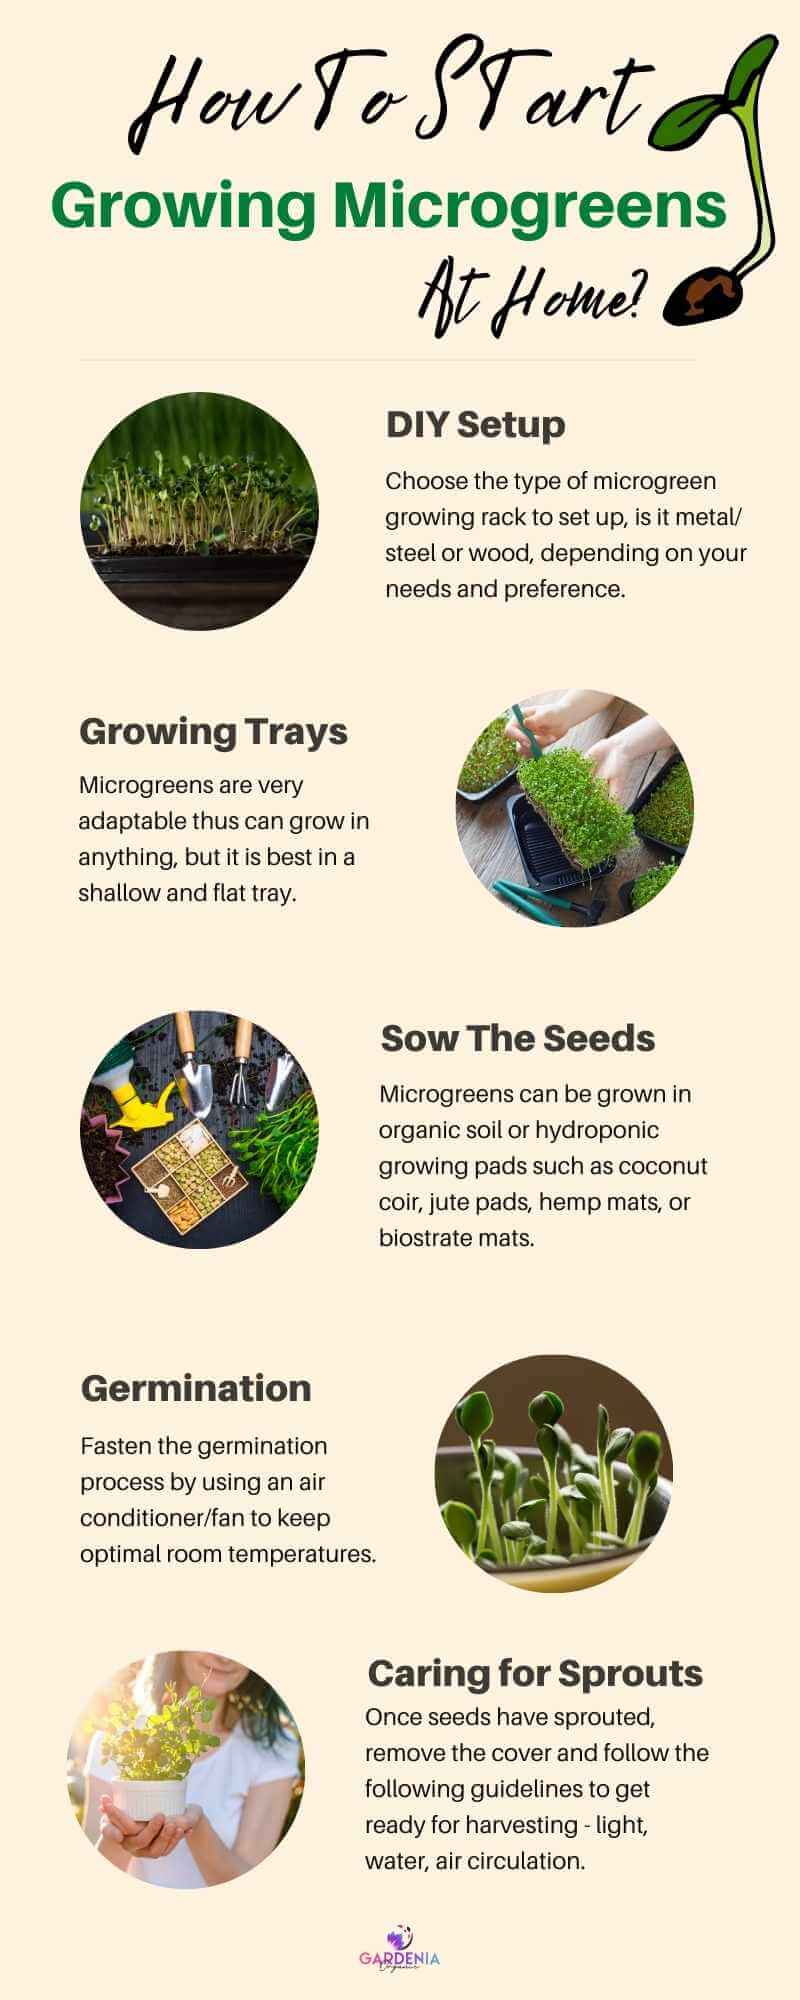
- Choose the type of microgreen growing rack to set up, is it metal/ steel or wood, depending on your needs and preference.
- For mobility, especially when cleaning under the shelf or rearranging the growing area, buy or build one with wheels.
- Based on the amount of microgreen you need, determine the number of racks to install and the growing spaces.
- Secure a location within your home to install the DIY shelf and keep it clean. Assemble rack legs and connect frames. Make sure it is balanced and secured.
- The distance in between the tiers should be about 9 to 12 inches. There should be enough shelf height spacing to allow enough room for growth and prevent microgreens from touching the lights if they get to grow too long.
- The next step is to secure mini fans to the edge of the shelves using zip ties through fan holes. Position them at the center of each rack to allow good air ventilation. Connect all the fans from top to bottom using their USB connection to form a series circuit.
You can also use a stand-up fan or install an air conditioner; however, the fan is more energy-saving.
Attach artificial grow lights that suit your needs but preferably 20 watts:
- Install two lights per shelf, parallel to each but equally spaced and center at both ends of the frame.
- Hang it with hooks and tiny links of chains. Zip tie the lighting wires.
- If you are using rack wires, secure the lights by sliding one of the power cords through one of the triangle openings on the rack’s frame, do it on both ends.
- Connect all bulbs to a timer by setting up the timer at the bottom of the power strips.
- Add shelf liners to keep the rack cleaner and protect plants from plant debris and soil on the lower shelf.
- Use zip ties to hold in place hanging wires to ensure an organized racking system.
Prepare Growing Trays
Microgreens are very adaptable thus can grow in anything, but it is best in a shallow and flat tray.
Ensure the tray has drainage holes; if not, poke a few holes in its bottom.
Lack of drainage holes can cause waterlogged soil due to poor drainage, hindering seed germination.
Furthermore: Well-draining containers can water excess water to microgreens below the shelf if the rack system is not laid with a shelf liner.
Sow The Seeds
Microgreens can be grown in organic soil or hydroponic growing pads such as coconut coir, jute pads, hemp mats, or biostrate mats.
The method to adopt will depend on your personal needs and limitations, as both ways are great.
Planting In Soil
Following the process:
- First, moisten the organic potting mix by adding a small amount of water and mix it with your hands or trowel. Hold some soil into your fist; it should hold into shape and not drip water out.
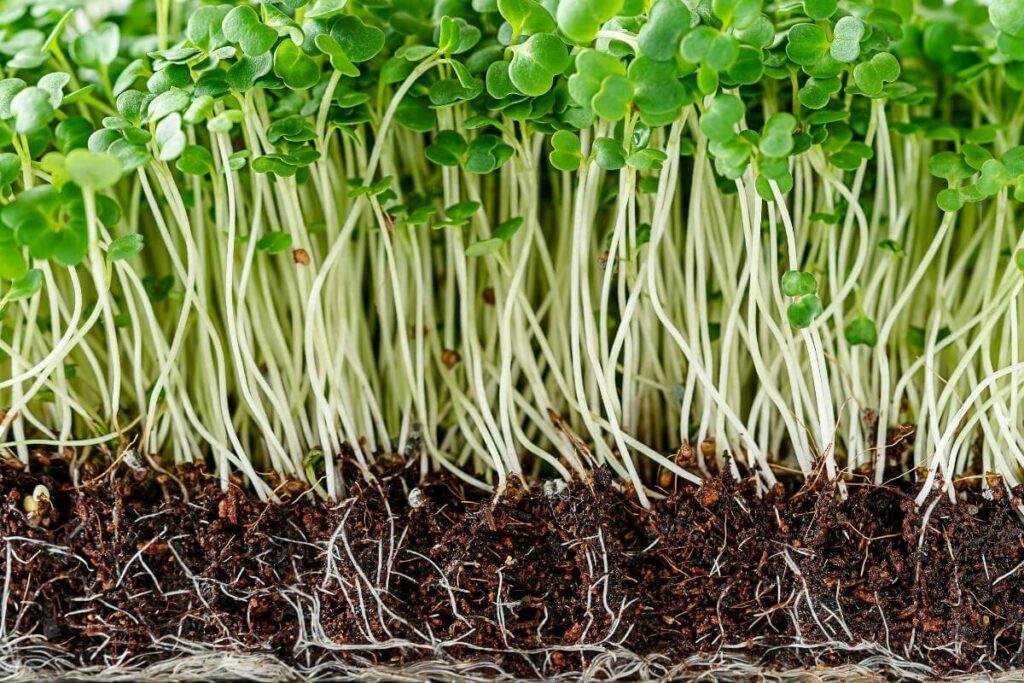
- Fill the trays with about two inches of moist soil. You don’t need a lot of soil because microgreens don’t take long to grow; hence don’t develop complex roots.
- Press gently into the soil using your hand or drag a piece of cardboard across the surface to flatten and level up the soil, taking care not to over-compress the soil. The even surface will help ensure that seeds have equal soil contact for even germination.
- Sow the seeds by broadcasting them across the soil surface. Gently pat down across the trays to set the seeds into the soil. It will help establish good soil contact enabling them to absorb more moisture and encouraging germination and growth.
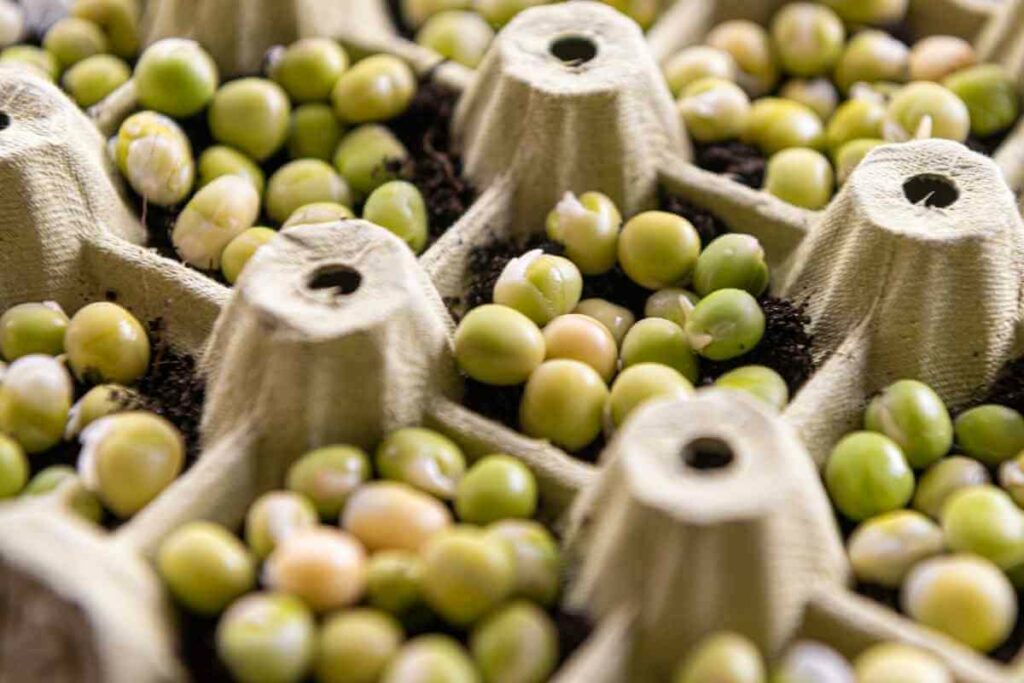
- You may soak the seeds for a few hours before planting, especially with a rigid hull or large seeds. Soak for about six to eight hours.
- Sprinkle some soil over the seeds to cover them with a thin layer. Use a watering can or a mister to dampen the surface. Make sure they aren’t soaked.
Planting in Hydroponics
Take a container and fill it with pure water.
Place a growing pad to fit the bottom of the container. Then move the hydroponic pad around the bottom and flip it one the other side to ensure it is well saturated.
Let it drip for a while, then take it and place it on the tray with draining holes.
Get the microgreen seeds and spread them evenly across the surface of the pad. You don’t have to presoak them.
Add a pH-Up or pH-Down solution to the water to balance its pH. It should be close to 5.5 to 6.5.
Works Well: Mist the seeds’ surface lightly with pH-balanced water; be careful not to move the seeds too close together accidentally.
Seed Germination and Sprouting
Microgreen germination occurs best at 720F.
If temperatures are too high or low, fasten the germination process by using an air conditioner/fan to keep room temperatures at 720F or place a starting seed mat when temperatures are low.
Otherwise, have patience and wait for them to sprout.
Germination In Soil
After sowing, cover the trays for at least five days with either a humidity dome or by stacking them together if they are of the same size.
It will maintain moisture levels and protect the seeds against light, promoting higher germination rates.
You may also cover the trays with plastic bags or plastic wraps with holes snipped in the top for airflow, a damp paper towel, or leave them open.
Trays left open in the air will need to be misted with a spray bottle at least once a day.
Don’t turn the lights on as the seeds require no light at all to germinate but moisture.
What to Expect: Within three to seven days, you’ll see seeds sprouting.
Germination In Hydroponics
After planting, take another tray without holes and use it to cover the tray holding the growing mat/pad and the seeds to keep them in the dark away from light.
Based on the type of microgreen, they should be left in the dark for the first five days or so. The tray should only be opened when misting, which should be done every 12 hours or so.
Four or five days after, you can gently lift the tray with the seeds in it and check if they have germinated. You should see roots at the bottom.
Remove the cover and begin watering the bottom tray as well as the sprouts and pad.
Just spray some plain water into the bottom tray until there is a skinny layer instead of misting them—water twice a day for the next few days with plain water.
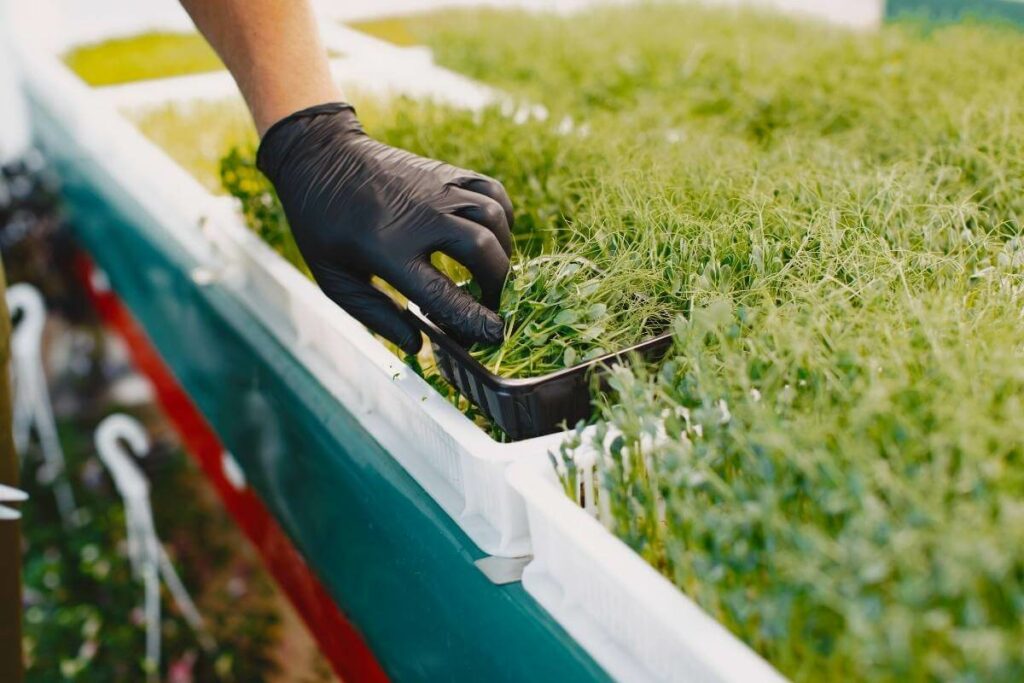
Caring for Sprouts In the DIY Shelf Setup
Once seeds have sprouted, remove the cover and follow the following guidelines to get ready for harvesting.
Light
Turn on the grow lights to shine on the uncovered trays for 12-18 hours a day to enable faster growth and ensure healthy microgreens.
The grow lights provide enough light exposure on the seedlings, irrespective of the weather outside.
Microgreens require lights for photosynthesis. Otherwise, you will get leggy or pale greens.
Use the electric timer to set the lighting duration to avoid exposing the crops to too much light.
Water
Watering should be every one or two days or when the growing medium begins to dry. The plant medium should be moist enough and not soggy.
For soil-based microgreens, make sure the soil is dry in between waterings, whereas for hydroponic microgreens, water when the pads or edges of the containers begin to feel dry and shouldn’t be poured directly over the growing mats.
Watering frequency is crucial:
- Underwatering could dehydrate the microgreen and cause its death.
- Overwatering may cause disease and mold growth.
The most recommended watering setup for soil-based and hydroponic microgreens is the bottom watering, as it ensures even watering.
Bottom watering is set up by placing the microgreen tray planters inside a larger container. About an inch of pure water should be added to the tray below.
For hydroponics, use fertilizer solution (Take fertilizer and mix it with pH-balanced water).
Drainage holes in the trays will allow the soil to wick up water while sitting on the bottom watering container, which the soil-based microgreens absorb the water through its drainage holes.
After leaving the tray in the container for a few minutes, drain the excess water as it can overwater your plants.
If you can’t do the bottom watering, water around the growing microgreens rather than directly over them.
Be Careful: Top watering leads to high transpiration, which causes high humidity, wet leaves, and stems, increasing chances of disease development and mold growth.
Air Circulation
Good airflow is critical for growing healthy microgreens, especially in a growing room or greenhouse, since air indoors is relatively devoid of movement.
Air ventilation allows fresh air by preventing depletion of the Carbon dioxide, making the plants stronger, and guards against mold, pests, and root problems. It prevents fungal diseases in winter and cools microgreens in the summer.
The ideal amount of air circulation depends on:
- the humidity level
- and temperature in the room
If you have moderate temperature and low humidity, you shouldn’t turn on the fans. Set fan level that won’t cause too much airflow as it causes the microgreens to fall.
Good airflow can also help with cooling the air temperature. Therefore you need to use the fans to help maintain temperature and moisture levels.
You can use an air conditioner instead of a fan to keep it at 78 0F.
Humidity
Microgreens’ ideal moisture ranges from 40-60%.
The good thing is that the humidity level at home is usually around 40-50% on average.
When the environment is too humid, it can pose health risks to microgreens. Dry air may also make them dry out as they may lose more water than they can retrieve via their roots.
Watering microgreens, poor ventilation, and house activities like showering and cooking lead to high humidity.
Correct this by turning on the fans to increase airflow, the Air conditioner, or dehumidifier to reduce high humidity.
You can improve too dry air by misting more often or using a humidifier.
Final Thoughts
Using a DIY rack system is one of the best ways to grow microgreens.
A DIY Microgreen setup increases your yields and helps you save money as they are pretty much expensive in the market.
On top of that, it is simple to install and operate. With it, you are also guaranteed to harvest healthy and nutritious microgreens any time and any day.
Thus, you can enjoy them in their rawest or freshest form cut directly from the “farm” and consumed immediately.