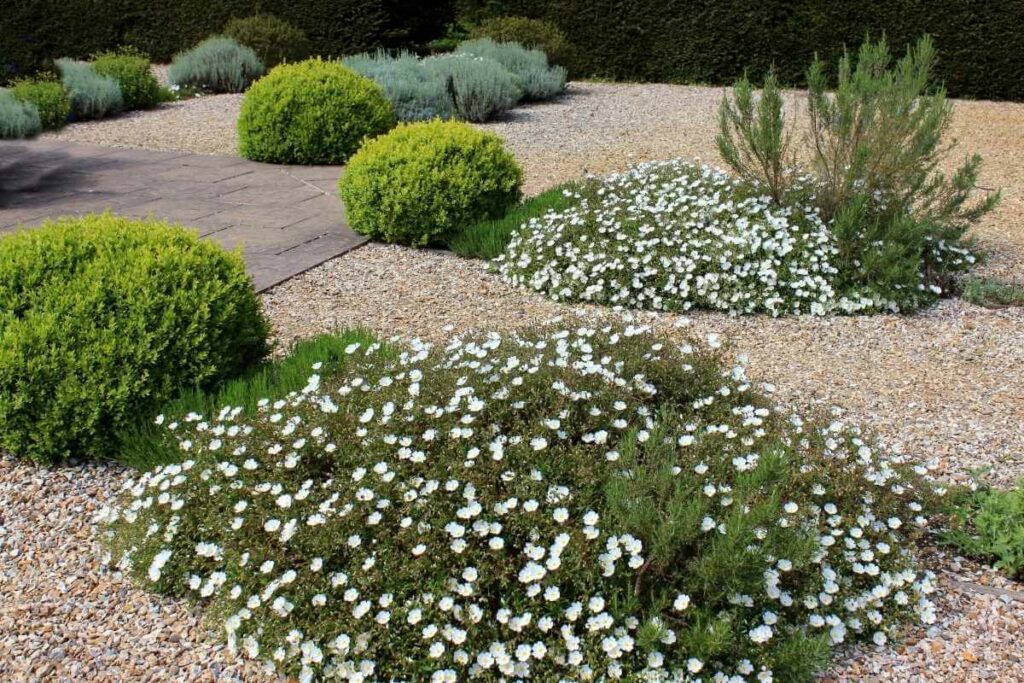
Gravel gardens are a great option when you want beautiful plants in your garden but you want something a little lower in maintenance than a standard garden.
These gardens are easy to accommodate as long as you know a few of the rules and choose the right types of plants to go in them.
Learning how to lay gravel on soil correctly is an important part of the process because if you don’t get this right, the rest of the process won’t go smoothly.
Laying gravel on soil isn’t difficult because it essentially involves clearing out the garden space, digging over the ground to stimulate the soil, adding coarse sand when necessary, digging an outside border, and laying a weed membrane over the area. These and a few other steps are all you need to have a great-looking gravel garden in the end.
Fortunately, we’ve developed a step-by-step guide that can help even beginning growers set up the perfect gravel garden.
Step 1: Know What Types of Plants to Buy
Not all plants do well in gravel gardens, but some of the ones that do include the following:
- Iris
- Rock roses
- Daisies
- Thyme
- Aloe
- Lilies
- Cacti
- Lavender
- Yucca
- Feather grass
If you don’t like any of these, you can talk to someone at a gardening center or nursery and they should be able to direct you to some other plants that will work just as well.
Step 2: Get All of the Vegetation Removed and Prepare the Ground
To start your gravel garden, you’ll have to clear out some space where your garden will go.
Make sure you clear out everything, including weeds, plants, and even the grass.
INNO STAGE Gardening Tools Set and Organizer Tote Bag with 10 Piece Garden Tools
Go ahead and save those plants that you’d like to replant in the garden when you’re done.
When you’re finished with this step, dig over the ground a few times to stimulate the top layer of soil.
Afterwards, rake the ground well so that any lumps are broken down, and place either fertilizer, manure, or compost on top of the soil.
Consider This: If the spot is one you feel doesn’t drain well, you can add a little coarse sand as well.
Step 3: Make Sure to Dig an Outside Border
Always dig an outside border when creating a gravel garden.
Ideally, you’ll create one that is a few inches deep and about four inches wide. You’ll do this to separate the garden from the patio, grass, or even your flower beds.

When you’re done with this, go ahead and lay a weed membrane over the entire area and secure it with either large rocks and stones or some type of weights.
If your gravel garden will be a self-seeding one, you can skip this particular step.
Never use plastic in place of the weed membrane because it simply won’t work as well.
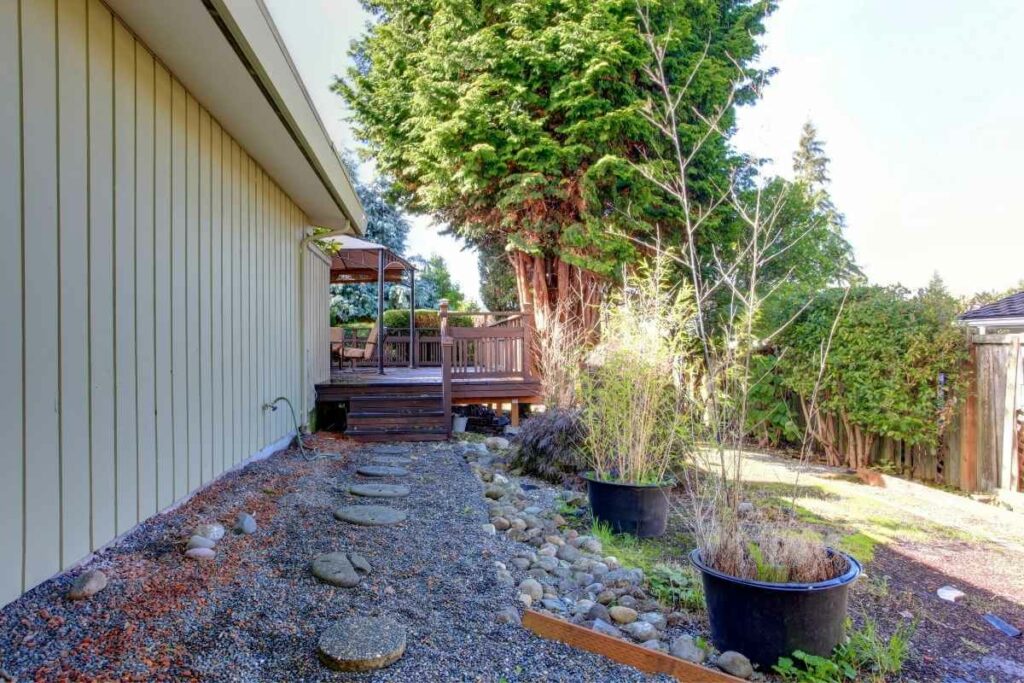
Step 4: Choosing Your Gravel
Before you learn how to lay your gravel correctly, you’ll have to know what kind and how much gravel to purchase.
For starters, you’ll have to measure the area before you know how much gravel to buy.
Generally, an area 10 square feet in size and two inches deep will need approximately 90 pounds of the one-inch gravel.
If your garden has an odd size and isn’t a standard shape, just measure the width and length around the area.
As far as the type of gravel used, it’s best not to get anything too small because it can easily escape the border area.
Gravel such as colored slate chippings or crushed stone does well in gardens, but be careful with the latter because it sometimes has sharp edges that can harm pets and bare-footed children.
Your Choice: You might also want to get dark-colored gravel because the light-colored gravel sometimes fades and looks very dull over time.
Step 5: Spreading the Gravel
At this point, you’ll want to finish your borders before starting with the gravel.
With this step, there are two things you can do:
- First, you can add some type of edge, such as a metal strip, and bury it into the borders so the gravel will stay in place. This type of edge also improves drainage, which always helps if your soil has any amount of clay in it.
- The second option you have is to place boulders or large pebbles around the area and use them as your border. Now you can place the plants you want planted in their respective spots.
You might want to place all of your pots where you want them to be, then take a step back and look at your creation to see if it looks right to you.
When you’re happy with the design, cut crosses (never cut holes) into the sheets of the membrane, dig holes, and plant your pots.
Add a little compost just to stimulate their growth, make sure that the edges of the membrane are tucked under the plants well, then give them some water.
When you’re laying out the pots, make sure that you leave enough room in between the plants so they can grow properly.
Now, you’re ready to spread the gravel.
When doing this:
- you also have to take any focal points such as rocks, stone benches, etc., and place them in the position you want them to be.
- Afterward, spread the gravel evenly over the membrane and around your focal points and plants.
- When you work next to the borders, make sure that some excess gravel mulch is kept to the side so that you can use it to fill in the holes in your garden later on.
- Next, take a rake and smooth down the garden so there are no uneven spots. Be careful when raking the gravel because you don’t want to damage any of your freshly planted shrubs or flowers.
Step 6: Maintaining Your Gravel Garden
With a gravel garden, you’ll have very little to do because they are so low-maintenance, especially once the garden is established.
You will occasionally have to do a few things just to keep the gravel nice and neat and take care of the plants themselves.
Other than these things, gravel gardens require little to no maintenance year after year.
Nevertheless, here are some issues that you’ll have to be aware of:
- To clear debris such as fallen leaves or blooms or even weeds, use a plastic rake, leaf blower, or even a stiff brush. Weeds should be pulled by hand, and you may even have to add small amounts of gravel every now and then.
- Take proper care of your plants just as you would if they were in a standard garden. If they need to be deadheaded, trimmed, or otherwise taken care of, do this when the proper time comes.
- Keep in mind that you’ll rarely have to water your plants, but you may have to feed them occasionally to keep them thriving.
- If you choose a self-seeding garden, which means a garden without a weed membrane, it will need regular weeding and a little more work than a regular gravel garden does.
And keep in mind that you can always add other plants later on if you like.
Besides the plants mentioned above, gravel gardens go well with various shrubs, succulents, herbs, and grasses.
You’ll have to choose wisely, of course, but once you learn that it does well in a gravel garden, just plant it as you did the other plants.
Naturally, plants that are drought-resistant do best in a gravel garden, so look for these for the best results.
In Summary
Making sure you follow some simple step and prepare the ground well will prevent issues over time.
The last thing you want to do is have to do the work again in a few months time.
Also Helpful
- 7 Centipede Grass Problems You Might Be Having
- Best Soil For Chili Plants (Complete Guide)
- 10 Perfect Plants for Pallet Gardens